
This article is a walkthrough for “And Then The Hero Was Never Seen Again” by the circle “Poison”. You can download the English Translated Game from Here. In addition to walkthrough charts and a list of H-scenes and conditions, it also contains various data such as a list of abilities and battle techniques, so please be careful of spoilers.
Story Introduction
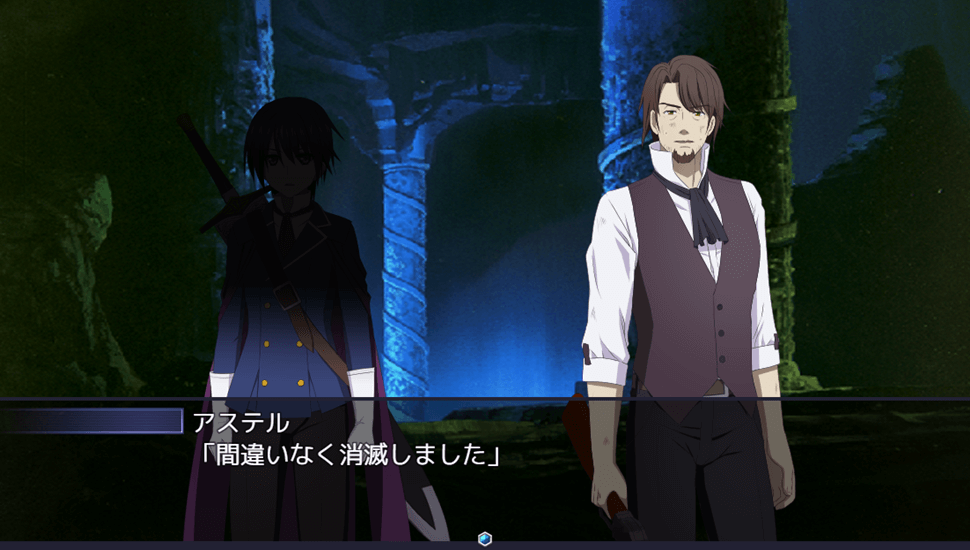
Surrounded by steep mountains, in a land unexplored by humans, in the deepest part of the isolated, deep vertical hole “The Great Cave” on this earth, the hero and the demon king are about to face off. The hero Aster succeeds in defeating the demon king with overwhelming strength, but is hit by a mysterious magic just as he is about to return home.
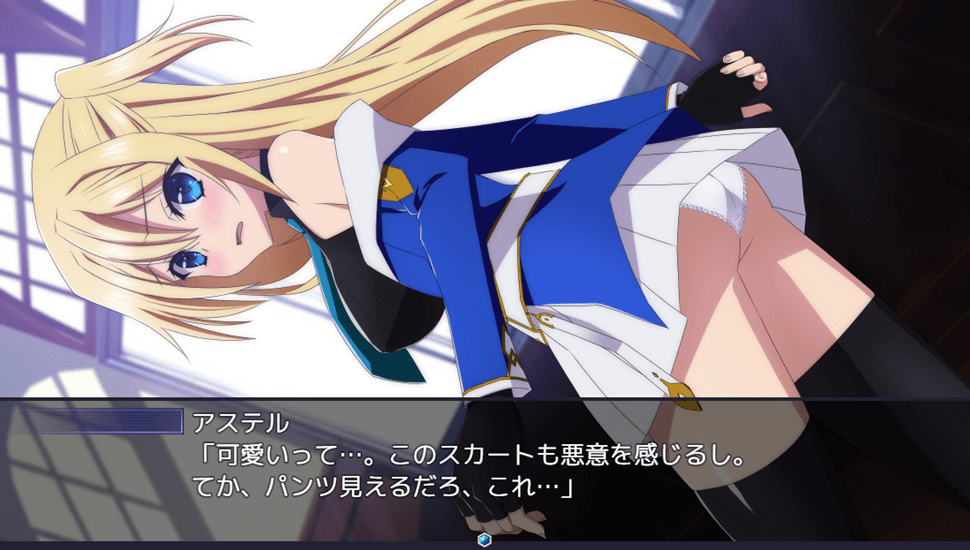
After receiving the magic, the hero and his party suddenly find themselves outside the vertical hole, where Aster has taken on the appearance of a woman. After the battle with the Demon King ends and Aster returns to the kingdom, she is shocked to find herself transformed into a woman and shuts herself up in her rundown apartment.
Having run out of money due to her reclusive lifestyle, she visited the guild hoping to receive subsidies, but due to government policy, she was no longer able to receive subsidies. In her dire situation, William, her former comrade who had fought alongside her, appeared before her .
He now seems to be running a private postal company called ” Wall Post ,” and because of their old friendship, Aster decides to join the company as a member of the Carrier Corps. The Carrier Corps’ goal is to discover the ” Portals ,” which are transfer devices to ancient civilizations scattered all over the world, and Aster will be working in tandem with the demon Ima …
Comments and reviews
① A classic RPG that can be enjoyed like an anime

This work is based on a one-cour anime and consists of 12 episodes. It also has opening and ending videos with theme songs, so you can play the game as if you were watching an anime. It is a high-quality work that you wouldn’t expect from a doujin work, and it is possible to play the game with the feeling of watching an anime .
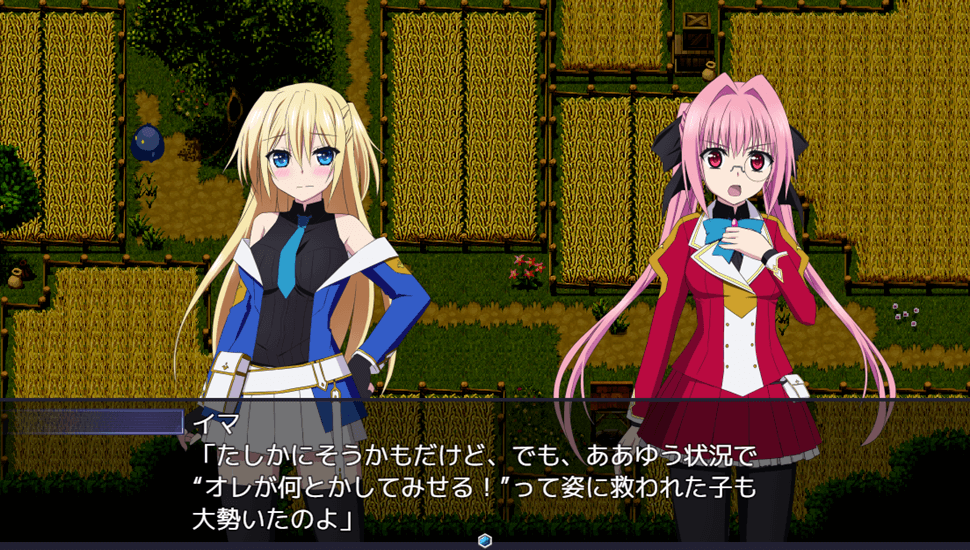
The characters are all unique, and by listening to their conversations while moving around the field, you can learn about their unexpected sides. The characters are well-developed, so it’s easy to get attached to them, and the story is well-crafted, making it easy to get immersed in the world of the story.
②Highly strategic battle system


The protagonists’ goal is to search for ancient relics called “Portals” found all over the world, and in the process, they will explore fields and dungeons where monsters appear. Combat begins when you come into contact with a monster, which is displayed as a symbol. Combat in this game is in the command battle format that is familiar from other RPGs.
At first glance, the combat may seem simple, but there are many customization elements available, such as a set of abilities that act as passive skills and an inheritance system that grants skills to weapons, allowing you to enjoy highly strategic battles, such as changing your combat style depending on the type of enemy.
When you defeat an enemy, a number called battle history points accumulates, and these points can be exchanged at a certain location for doping items or items that unlock all memories. There are five difficulty levels in this game, from normal to catastrophe, and the higher the difficulty level, the more points you can get, so if you’re confident in your skills, we recommend trying to play at the highest difficulty level.
③ Defeat H and outside negotiations

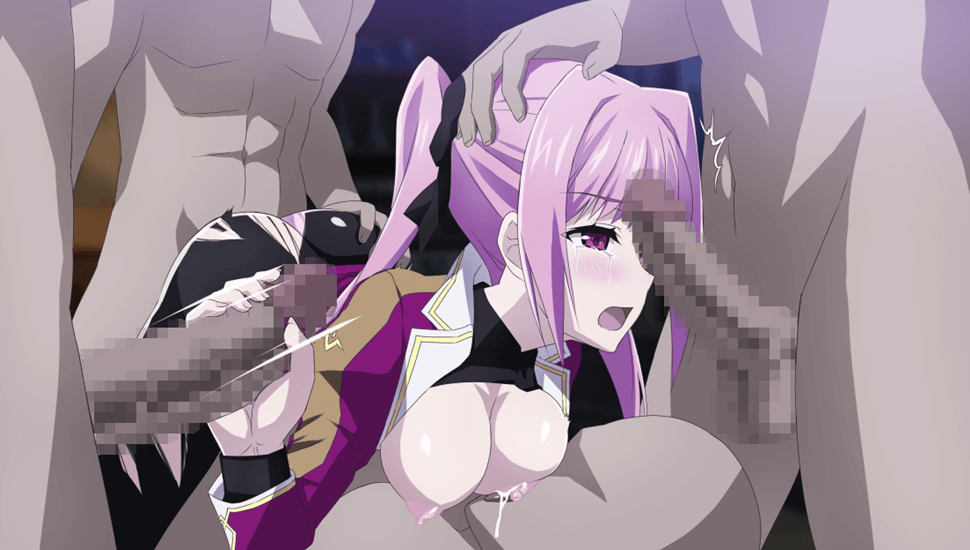
During the story, you may have to fight bosses that are more powerful than the small enemies, and if you lose you will get to see a defeat H-Scene. These H-Scenes are prepared for all party members, and the system allows you to choose which heroine you want to see when you are defeated.

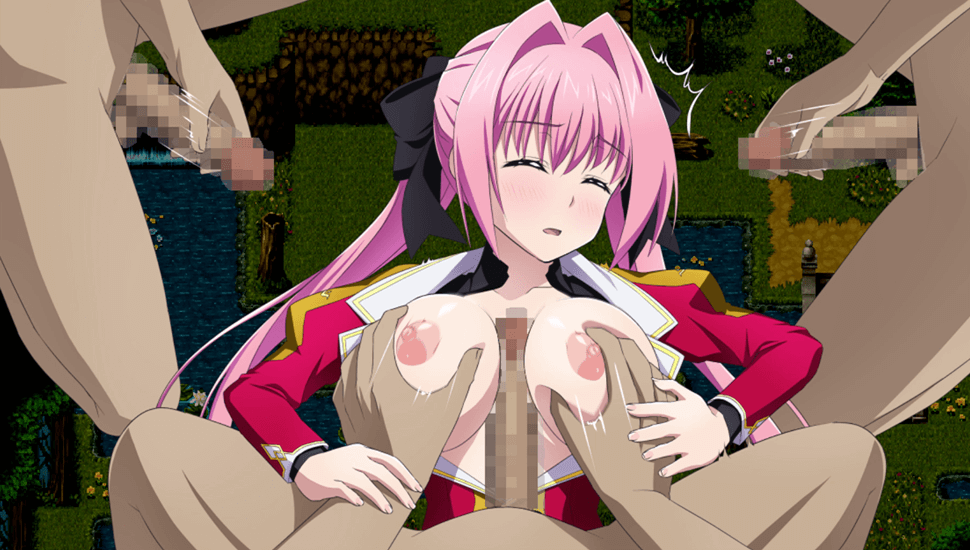
If you are defeated by the first goblin you fight, you will be attacked by the fake hero and his party while lying unconscious. While you are unconscious, they will mount you and give you a titty fuck, then splash a huge amount of semen all over you.
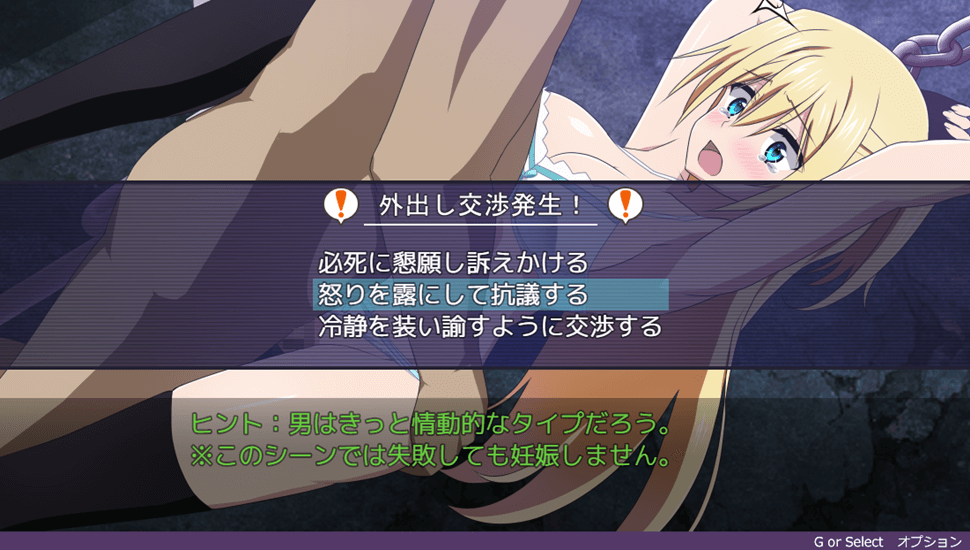

In some H-Scenes, an event called ” Out-of-Vagina Negotiations ” may occur. This is a system that allows you to have the other person out-of-vagina by saying words that match their personality, in order to lower the chances of pregnancy during H-Scenes that involve vaginal penetration. You can enjoy slightly different developments in the same scene, such as losing the bargain and being forced to have sex, or fawning over the man and having him out-of-vagina.
④Horny part-time job and BF strip poker


The protagonists can also take on part-time jobs to earn money in the old town, where there are many different shops. Some of the jobs may involve sexual content, and as the story progresses, they will also be able to work in shady shops and brothels.
When Aster works part-time cleaning a public bath, she is seen being watched by male customers as she undresses, and is used as masturbation material. Many of the H-scenes are staged, and the more she works the part-time job, the more extreme the play becomes.


Among the many H-scenes in this game, the most distinctive one is the H-event called ” BF Yakyuken “. This event occurs in a specific location, and you will play rock-paper-scissors against your enemy. A prediction of the enemy’s move is displayed, but there is a 25% chance that the prediction will be wrong, so you may end up in an H-scene in an unexpected place. Each time you lose, the gameplay becomes more extreme.
In the public bath, Aster has to play a game of BF strip poker with three male customers to get her stolen underwear back. At first, it’s just kissing and blow jobs, but if she loses many times, she ‘ll end up being double penetrated, gang-raped, and raped until she’s covered in semen.
5. Dress-up and pregnancy elements

This game also includes a ” dress-up element “, meaning that in addition to casual clothes and battle suits, you can also change into special outfits such as a cat-eared maid swimsuit.
Hairstyles can also be individually set, and depending on the combination, you can go on an adventure in a completely different look. The outfits you change are reflected in the H-Scenes, so even if you’ve already seen a scene, changing your appearance may give you a slightly different impression.
The toilets in the dormitory where the protagonists live can be set to safe or dangerous days when used. If you set it to a dangerous day, you will receive more H-EXP, but the chances of getting pregnant when you are creampied will increase.


When you become pregnant, your status will decrease, but you can cure this by giving birth in your bed. There is a birth scene, but it is a soft one that does not depict any graphic scenes of the fetus, so even those who are not good with direct expressions can rest assured.
You can also check each character’s H status from the menu . In addition to basic information such as the number of sexual acts, you can also hear their voice comments on their recent play. When you reach a certain amount of H experience points, which you can obtain by watching H scenes, you will level up and be able to obtain abilities and items, so the more you have sex, the more advantageous it will be for you to progress through your adventure.
⑥ Impressions and reviews
The circle ” Poison ” sells doujin games such as “Mikogami-sama” and “Chris Survival”, and in this game, the adventure begins with Aster, a former hero who has been turned into a woman, Ima, a princess of the demon tribe, and Disaster, a girl who has a deep connection with monsters.
Not only is there a large number of H events, but there are also a wealth of illustrations from the story and in daily life, making this a gorgeous work that will have you wanting to know what happens next. Most of the H scenes are about defeat or part-time work, but as the story progresses, prostitution and other situations will also become available.
The in-game tutorial is also thorough, and the places you need to go are marked with markers, so there are few situations where you will get lost. You can choose from five difficulty levels for battles, and for those who want to progress quickly there is also a mode called “super easy mode”, so you can choose the one you like depending on your play style. This is a recommended work for those who like works with female protagonists.
Q&A Frequently Asked Questions
Q. How to unlock all H scenes?
A. After the ending, purchase “Reminiscence Mode Fully Unlocked” at the Extra Shop
and then save to unlock all the memories.
*Please note that there is a bug in ver1.02 that prevents the scenes from being unlocked properly.
Q. I can’t beat the enemy
A. If you turn on the super easy mode in the options, the enemies will be significantly weakened.
If you don’t want to lower the difficulty, try purchasing doping items at the extra shop or reviewing your weapon inheritance skills.
For doping items , I personally recommend increasing Imma’s magic power, which can deal damage to both small enemies and boss enemies .
For weapon inheritance skills, I recommend “Heal Circle,” which has a full recovery effect, and “Moonlight Curtain”, which increases the defense of all allies.
Q. I can’t work part-time at the public bathhouse.
A. As the story progresses, you’ll be able to get a part-time job.
It will be unlocked around the middle of Chapter 3.
Q. Unable to get High-Class Prostitute Outfit
You can get by working part-time in the town you visit in episode 9.
Q. Idol clothing can no longer be obtained
from version 1.04, but can now be exchanged at Govan Casino.
Q. I can’t enter the arena, the newspaper and the dictionary aren’t updated.
A. This doesn’t seem to have been implemented yet, but it will be added in a future update.
Walkthrough
Only items that were confirmed during gameplay are listed as dropped items.
Material items used for synthesis only drop on Hard difficulty or higher.
Also, the information listed is mainly from version 1.06, so the contents may have changed due to updates.
Episode 1 “Wall Post”
Old Town
Once you’re able to control the character, leave the apartment and head to the Guild Hall in the west of town.
Talk to the receptionist to get the “Extra Key” and “Portal Key” after a conversation event.
Talk to Ima at the entrance to get 500G and have him join your party.
After that, talk to the receptionist at the weapon shop to get the “Battle Technique (Pain Attack I)”.
You can do combat training in the basement of the Guild Hall, and if you succeed in defeating this enemy, you will obtain the ability ” Immovable”.
You can purchase a “Part-time Job Notebook” for 100G from the reception on the first floor of the Guild Hall, so be sure to get one.
Once you’re ready, head to the highway (field) from the north of the old town.
Items you can get from Professor Chicken:
Wall Post… Return Bell;
Public Bath… Love Sisolas;
Weapon Shop… Battle Technique (Flame Dance I);
Tool Shop… Private Clothes Ticket;
Private Room… Abort Bomb
*H-Event*
・Peeping/Public Bath
This will occur if you take a bath in a public bath and take off your clothes.
・Cleaning the Public Toilet
If you talk to the woman near the toilet in the northwest of town while wearing casual clothes, you can get a part-time job.
If you do the part-time job, an H scene will occur and you will receive 50G as a reward.
Highway (field) ~ Flowing Flower Forest
The locked house along the way can be opened with the ” Great Thief’s Key”, which can be obtained at the monster researcher’s house that you can reach as the story progresses.
When you reach the end, you will enter a boss battle. If you are defeated, an H scene will occur and you will be returned to the tent.
After the victory, you can enter the crack in the wall by examining it, and proceed to the destination.
When you reach the end, you will return to the old town.
Report to Ilse at the wall post to receive 1000G.
Items you can get from Professor Chicken:
Tent… Mysterious Grass
- Chocolate cornet
- Apple Jelly
- Traveler’s Talisman
- 80G
- Energy Potion
- 5000G (Great Thief’s Key)
Monster
| monster | Experience point | money | Dropped Items |
| Squishy | 6 EXP | 2G | Combat Technique (Heal Circle I) |
| Carota | 7EXP | 3G | Battle Technique (Healing Wind I) |
| Kinopi | 9EXP | 3G | Battle Technique (Flame Dance I) |
| Goblin Soldier (Boss) | 17EXP | 12G | Love Solas |
Employee dormitory
After parting ways with Ilse, head to your room in the dormitory and then enter the communal bath.
If you go out into the hallway at night and then return to your room, you will be in a battle with Ninja Caster.
Even if you lose this battle, the story will continue.
When you reach the public bath, you will head to rescue Amy.
Go ahead and check the sign, then get the “Ladder” from the dining room in the room opposite the bath.
(The ladder will not appear unless you check the point.)
When you reach the end, you will enter a boss battle, and if you lose, an H-scene will occur.
If you win, the first chapter will end.
- MC Gain Ⅰ
- Apple Jelly
- hot dog
- Energy Potion (Conversation)
- Carrot Juice (Conversation)
- Carrot Juice (Conversation)
- Chocolate Cornet (Conversation)
- Elixir
- ladder
Monster
| monster | Experience point | money | Dropped Items |
| Ninja | 14 EXP | 10G | Battle Technique (Pain Attack I) |
| caster | 17EXP | 9G | Battle Technique (Flame Dance I) |
| Ruta (Boss) | 45 EXP | 30G | none |
Boss Ruta
He will use skills that will lower your defense, so be sure to keep an eye on your remaining HP as you fight.
Episode 2: The Devil’s True Nature
Granary area – Mountain path
When you head to the president’s office, you will leave the old town and head out into the field (highway) to search for a portal, then head west from the city walls to the grain belt.
If you talk to a woman along the way, you will receive “2 freshly baked breads”.
Along the way, you will encounter a boss battle with a Mimic, and if you lose, an H-Scene will occur.
After defeating the Mimic, you will find a portal at the back and return to the Old Town.
If you head north of the Old Town, you will automatically be transported to the Jail.
- 70G
- Apple Jelly
- 100G
- Freshly baked bread
- 50G
- Silver Ring
- Chocolate cornet
- MC Gain II
- Wristband (Great Thief’s Key)
- Sexy Bunny (The Great Thief’s Key)
Monster
| monster | Experience point | money | Dropped Items |
| Pippi | 16 EXP | 4G | Battle Technique (Pain Attack I) |
| Mischievous Goblin | 13 EXP | 10G | Combat Technique (Heal Circle I) |
| Poison moth | 19EXP | 5G | Battle Technique (Flame Dance I) |
| Angry Balloon | 14 EXP | 7G | Battle Technique (Healing Wind I) |
| Mimic (Boss) | 53 EXP | 180G | none |
Boss Mimic
It’s “Poison Breath” skill will poison all allies.
Use “Freshly Baked Bread” or Aster’s “Treat” to recover.
If you can put out a certain amount of firepower, you can focus on attacking without recovering.
Prison
After the conversation, you will be given a choice.
If you choose “Think of another way”, the H-Scene ” Perverted Prison Guard ” will occur.
If you choose “Desperately beg and appeal” to negotiate for ejaculation, you can avoid creampie.
After the event, you will obtain the “Prison Key” and aim to escape.
You can retrieve equipment from treasure chests along the way.
After that, examine the cloth in the cell next to where Aster was, and you will be able to proceed.
Unlock the door with the lever and proceed further in to enter a boss battle with a sewer slime.
There is no defeat event, so just fight normally.
After winning, move the lever and a bridge will be built, allowing you to proceed further.
If you go all the way to the end, you will be able to go outside, and after a conversation event, you will fight a mysterious enemy.
It is a defeat event that cannot be defeated even if HP reaches 0.
After the defeat, Ima will acquire the skill ” Arc Saber” and will be able to fight again.
If you are defeated in the rematch, an H-scene will occur, and if you win and go outside the orphanage, Chapter 2 will be cleared.
- 100G
- Freshly baked bread x 2
- Carrot juice
- Energy Potion
Monster
| monster | Experience point | money | Dropped Items |
| Venomous snakes | 14 EXP | 9G | Battle Technique (Pain Attack I) |
| Floating Octopus | 13 EXP | 10G | Combat Technique (Heal Circle I) |
| Depressed balloon | 16 EXP | 7G | Battle Technique (Healing Wind I) |
| Sewer Slime (Boss) | 70 EXP | 130G | Love Solas |
| Mysterious Enemy (Boss) | 120 EXP | 0G | Super Love Thesaurus, Antiphase I |
Boss Mysterious Enemy
The skill “Arc Saber” that you will learn when fighting again will be twice as powerful if Ima is poisoned,
so it is recommended that you do not remove the poison from Ima in this battle.
Episode 3 “Bronze Phantom”
Wall Post – Sewer
After talking to the receptionist at the wall post, head to the president’s office.
After that, catch an animal running around and talk to Ilse to get a “Magic Detector”, “Lane’s Photo”, and “Magic Academy Uniform Exchange Coupon x 2”.
Talk to the tailor to get the Magic Academy Uniform.
After that, head to the Magic Academy and go west at the fork in the road to the sewers.
Activate the lever in Area 6 and head east to enter the Magic Academy.
After joining Disaster, you can fight legendary monsters at the top of the ladder you reach by using the lever.
- Magic Stone × 3
- 100G x 3
- 200G
Monster
| monster | Experience point | money | Dropped Items |
| Baby Serpent | 14 EXP | 11G | Battle Technique (Pain Attack I), Strong Branch |
| Flying Ryugu | 10 EXP | 21G | Combat Technique (Heal Circle I), Sturdy Branch |
| Poison Octopus | 10 EXP | 16G | Battle Technique (Flame Dance I), Sturdy Branch |
| Hard Rock Cafe | 16 EXP | 14G | Combat Skill (Healing Wind I), Sturdy Branch |
| Comfortable Bone Serpent (Legendary Monster) | 220 EXP | 180G | Magic Stone Box Silver |
Magic Academy
Approach the group lecturing in the garden at the end of the east corridor and Disaster will join you.
Head to Lane’s lab at the end of the west corridor and question six students.
After the event with Lane, talk to the head of the art club to trigger an H scene.
After the questioning, enter Ricardo’s lab and examine the bookshelf to access the Catacombs.
Students conducting the investigation:
1. A female student at the Garden Cafe
2. A male student at the Garden Cafe
3. A male student in the library
4. A female student in the garden
5. A female student sitting on a bench outside the school
6. A male student on the terrace (where the battle skill treasure chest is located)
Items you can get from Professor Chicken:
West Corridor (after Lane’s Lab event)…Super Tool Set & Synthesis Recipe I
- Battle Technique (Upper Lip I)
- Magic Stone × 2
Catacombs
The iron bars with the red treasure chest in Area 1 can be opened if you have the ” Great Thief’s Key”.
After pressing the switch in the underground laboratory at the back and reading the diary, you will return to the surface.
When you leave the laboratory, you will encounter a boss battle.
If you lose this battle, an H-scene will occur, and if you win, you will have cleared Chapter 3.
- Pancake
- Elixir
- Tangerine jelly
- 1000G
- Energy Potion
- 7000G (Great Thief’s Key)
Monster
| monster | Experience point | money | Dropped Items |
| Empty Night | 18EXP | 14G | Battle Technique (Pain Attack I), Strong Branch |
| Ghost Magician | 14 EXP | 18G | Battle Technique (Flame Dance I), Sturdy Branch |
| Whips | 16 EXP | 19G | Combat Skill (Healing Wind I), Sturdy Branch |
| Zombie Wolf | 18EXP | 8G | Combat Art (Upper Lip I), Combat Art (Crack Shot I), Sturdy Branch |
| Ghost Robe | 13 EXP | 22G | Combat Technique (Heal Circle I) |
| Guard Golem | 100EXP | 100G | Magic Stone, Sturdy Branch |
| Phantom (Boss) | 180 EXP | 350G | Super Love Citrus |
Boss Phantom
He doesn’t use any special attacks, but he does attack all enemies, so inheriting a skill that heals all allies, such as “Heal Circle”, will give you an advantage.
Episode 4: One Curse, One Life
Sewer to underground parking lot
If you examine the iron bars in Sewer Area 4, you will be able to go to Area 9.
If you go through the Sewer Management Office, you can go to the underground parking lot.
If you go further, you will arrive at Govan Under Resort.
- Magic Stone x 8
- 1000G
- Carrot juice
- Pancake
- 300G
Monster
| monster | Experience point | money | Dropped Items |
| Bodyguard A | 27 EXP | 34G | Battle Technique (Pain Attack I), Battle Technique (Heal Circle I), Sturdy Branch |
| Bodyguard B | 25 EXP | 28G | Crackshot I, Upper Lip I, Strong Branch |
| Bodyguard C | 26 EXP | 36G | Battle Technique (Flame Dance I), Battle Technique (Healing Wind I), Sturdy Branch |
Govan Under Resort
In the casino area, you can earn casino coins by playing slots.
The prizes you can exchange for are better than the equipment you can get at this point, so if you can afford it, you can get it to give you an advantage in battle.
There is one slot machine that is easy to win on, and the location is reset when you leave the casino.
Talk to Junie in the stage venue to complete the security camera mission.
Avoid the displayed camera area and get to the southwest to reach the ventilation duct.
Items you can get from Professor Chicken:
Govan Under Resort…Burki’s Lantern
Govan Casino…Pig Piggy Bank
*H Event*
・Balloon Distribution
Talk to the man in black at the night pool in the east.
・Ero Cheki
Have the idol outfit and talk to the middleman in the north of the casino.
The idol outfit can be obtained by exchanging it for 1000 coins at the casino.
- Casino coins x 200
- Magic Stone x 7 (during the security camera mission)
Ventilation duct
When you reach the end, you’ll be transported to a dungeon.
- 200G
- Magic Stone × 3
- Magic Stone × 5
- Casino coins x 120
- Elixir
- Pancake
- Casino coins x 300
- Casino coins x 80
Monster
| monster | Experience point | money | Dropped Items |
| Big caterpillar | 25 EXP | 38G | Crack Shot I, Upper Lip I, Hard Wood |
| Dragon-like | 42 EXP | 29G | Battle Technique (Pain Attack I), Battle Technique (Heal Circle I), Hard Wood |
| Phantom Cat | 19EXP | 53G | Battle Technique (Flame Dance I), Battle Technique (Healing Wind I), Hard Wood |
Dungeon
The “Dungeon Key” can only be used a limited number of times, but as long as it is not used where it is not needed,
it will allow you to rescue all of the treasure chests and imprisoned people.
If you open the lock and talk to the imprisoned man, you can purchase a special item called the “Cheater’s Magic Stone”.
If you talk to the imprisoned Katche, you will receive the ” Synthesis Recipe II “.
Once you leave the dungeon, you’ll enter a boss battle, and if you lose an H-scene will occur.
If you win, you’ll get the ” Fenrir’s Amulet ” and the fourth chapter will be cleared.
- Magic Stone x 14
Monster
| monster | Experience point | money | Dropped Items |
| Monster Rat | 34 EXP | 76G | Tactic (Upper Lip I), Tactic (Healing Wind I), Tactic (Crack Shot I), Tactic (Pain Attack I), Tactic (Heal Circle I), Hard Wood |
| Phantom (Boss) | 290 EXP | 560G | Super Love Thesaurus, Antiphase II |
Boss Phantom
When you reduce his HP by about 30%, his appearance will change and his HP will be fully restored.
His attack method is basically the same as the last time you fought him, but his firepower has increased, so be careful.
Episode 5: The Melancholy of the Monster Girl
Laurentian Gate to Dowdeswell Region
If you examine the iron bars holding the monsters imprisoned in the guardhouse along the way, you can fight a legendary monster.
After leaving the Dowswell region and talking to the woman in Berg Village, you will head to the monster grandfather’s house in the western cave.
If you talk to the grandfather, you will be able to defeat the monster in the lake and obtain evidence.
Return to Area 1 of the Dowswell Region, land on the isolated island in the lake where the monsters live, and after a certain amount of time has passed, you will enter a battle with Kachikachiyama.
If you win and give the “Kachikachiyama Shell” to the monster grandfather, you will obtain the “Legendary Monster Encyclopedia”.
Talk to the villager north of the road leading to the dam and you will return to Grand Tail for a while.
After talking to Ilse at the wall post, head to the president’s office.
If you choose “I followed Koopa”, an H scene will occur and Chapter 5 will be cleared.
*H Event*
・Public Bath Cleaning
Occurs when working part-time at the public baths in the old town.
・Orphanage Supervisor:
Talk to the sister at the orphanage in the slums and select “OK!”
- 2x Energy Potion
- 100G
- Magic Stone x 12
- Elixir
- hot dog
- Wrist Ribbon (Great Thief’s Key)
- Beach Goddess (The Great Thief’s Key)
Monster
| monster | Experience point | money | Dropped Items |
| Harpy | 37 EXP | 63G | Battle Technique (Break Arrow I), Battle Technique (Wise Wolf’s Song I), Hard Wood |
| Fairy’s | 39 EXP | 66G | Battle Technique (Wind Dance I), Battle Technique (Blessed Rain I), Hard Wood |
| Octopus Girl | 37 EXP | 75G | Combat Technique (Lightning Roar I), Combat Technique (Charge Thrust I), Hard Wood |
| Dark Knight of Retribution (Legendary Monster) | 500 EXP | 250G | Refining Material Box |
| Akari-chan | 33EXP | 71G | Combat Technique (Lightning Roar I), Combat Technique (Charge Thrust I), Hard Wood |
| Warwolf | 42 EXP | 68G | Battle Technique (Wind Dance I), Battle Technique (Blessed Rain I), Hard Wood |
| Kamaichitachi | 38EXP | 67G | Battle Technique (Break Arrow I), Battle Technique (Wise Wolf’s Song I), Hard Wood |
| Wizard Cat | 40 EXP | 82G | Rare clay, hard wood |
| Hard Rock Cafe | 16 EXP | 14G | Hard shell |
Episode 6 “The Arc-en-Ciel”
Arc-en-Ciel
Once you are able to control the ship, you will first head to deliver food to soldiers in various locations.
Once you have delivered food to four soldiers, you will be able to go to the wheelhouse on the second floor.
Once you head to the wheelhouse, you will automatically be transported to the crash landing beach.
Delivery to the soldiers
| place | Item to be given | Rewards |
| Soldier in the west area of 1F | Cleaning tools | Magic Stone × 5 |
| Soldier on 1F | Energy Potion | Magic Stone × 5 |
| Soldier at the 3rd floor shop | eye drops | Magic Stone × 5 |
| Soldier in the 3rd floor store | Discount ticket | Magic Stone × 5 |
| Soldier on the east side of the 3rd floor | Pamphlet | Magic Stone × 5 |
| Soldier in the 4th floor warehouse | Motion sickness medicine | Magic Stone × 5 |
| Soldier in the north of 4F | binoculars | Magic Stone × 5 |
Crash Landing on the Beach – Ruins
If you try to move south, a conversation event will occur.
After that, talk to Ozmond to proceed further.
When you reach the depths of the ruins, you will enter a boss battle, and even if you lose, there will be no H-scene.
If you proceed further after winning, you will have completed Chapter 6.
- 3x Energy Potion
- 400G
- 500G
- Rare Clay x4
- Jumbo Parfait
- 3000G
- Omelette rice
Monster
| monster | Experience point | money | Dropped Items |
| Fool fool | 43 EXP | 64G | Battle Technique (Lightning Roar I), Battle Technique (Charge Thrust I), Rare Clay |
| Wepal | 45 EXP | 63G | Battle Technique (Break Arrow I), Battle Technique (Wise Wolf’s Song I), Rare Clay |
| Gremory | 39 EXP | 71G | Battle Technique (Wind Dance I), Battle Technique (Blessed Rain I), Rare Clay |
| Ruins Boss | 400 EXP | 800G | Super Love Solas, MC Merical II |
Boss Ruins Boss
Uses a skill called “Light Fallen Imperial Sphere” to attack all enemies.
Depending on the difficulty level, it can be a tough battle if you don’t have new weapons.
Episode 7 “Bonds”
Arc-en-Ciel – Road to the Dam
You will proceed to escape from the Arc-en-Ciel.
Be careful, because if you touch the flames along the way, you will receive damage, and if your HP reaches 0, the game will be over.
Follow the path and examine the lever at the cargo entrance, then examine the container to enter disaster control and head off to rescue Aster.
All abilities will be removed, so reset them.
Follow the path to the dam and you’ll reach Doveswell Dam.
In the cave in Area 5, you can fight a legendary monster.
- Tangerine jelly
- 350G
- Magic Stone x 6
- 1000G
- 500G
- hamburger
Monster
| monster | Experience point | money | Dropped Items |
| Andromalius | 62 EXP | 66G | Battle Technique (Break Arrow I), Battle Technique (Wise Wolf’s Song I), Rare Clay |
| Andrea Alhus | 52 EXP | 72G | Battle Technique (Wind Dance I), Battle Technique (Blessed Rain I), Rare Clay |
| Uval | 44 EXP | 57G | Battle Technique (Wind Dance I), Battle Technique (Blessed Rain I), Rare Clay |
| Andras | 44 EXP | 58G | Battle Technique (Lightning Roar I), Battle Technique (Charge Thrust I), Rare Clay |
| Olias | 56 EXP | 68G | Battle Technique (Lightning Roar I), Battle Technique (Charge Thrust I), Rare Clay |
| Bottomless Cerberus (Legendary Monster) | 900EXP | 750G | Refining Material Box |
Doveswell Dam
Defeat the boss at the back of Doves Welldom and proceed to the next stage to clear Episode 7.
There is no H-Scene even if you are defeated by this boss, so just fight him normally.
- Energy Potion
- 300G
- 300G
- Magic Stone × 4
- Rare Clay x 12
Monster
| monster | Experience point | money | Dropped Items |
| Sabnack | 54 EXP | 68G | Battle Technique (Break Arrow I), Battle Technique (Wise Wolf’s Song I), Rare Clay |
| Sale | 57 EXP | 63G | Battle Technique (Wind Dance I), Battle Technique (Blessed Rain I), Rare Clay |
| Belial | 53 EXP | 59G | Battle Technique (Break Arrow I), Battle Technique (Wise Wolf’s Song I), Rare Clay |
| Doves Welldom Boss | 400 EXP | 800G | Super Love Thesaurus, Anti-Phase III |
Boss Doves Weldam Boss
Because this is a battle without Aster, there are fewer moves than usual.
It is easier to fight if Disaster is in the healer role, as Imma is more likely to put out firepower.
Episode 8: The Future of the Balance
Grand Terre Station
Go through the station and enter the train to head to the dining room.
Pick up a “rocket” along the way and talk to the man to the east.
After that, go back to your room, go outside the train and talk to the man with the CHECK icon.
You will then head through the desert to Harvey.
Forest to Water Cave
Once you pass through the water cave you can reach the desert.
- Power II
- hamburger
- tomato juice
- 300G
- Cat costume
- Moxibustion Gloves
Monster
| monster | Experience point | money | Dropped Items |
| Mooney | 62 EXP | 67G | Combat Art (Enforce I), Combat Art (Etherfeet I), Rare Clay |
| Mary | 56 EXP | 72G | Battle Technique (Thunder Dance I), Battle Technique (Dawn’s Light I), Rare Clay |
| Haunted Treasure Chest | 54 EXP | 450G | Battle Technique (Needle Pierce I), Battle Technique (Moonlight Curtain I), Rare Clay |
| Jellyfish | 62 EXP | 72G | Combat Art (Enforce I), Combat Art (Etherfeet I), Rare Clay |
| Sahagin | 70 EXP | 63G | Battle Technique (Thunder Dance I), Battle Technique (Dawn’s Light I), Rare Clay |
| Water spirit | 65 EXP | 66G | Battle Technique (Needle Pierce I), Battle Technique (Moonlight Curtain I), Rare Clay |
| Willow Whips | 61 EXP | 76G | Combat Art (Enforce I), Combat Art (Etherfeet I), Rare Clay |
| Scarlet Shoujo (Legendary Monster) | 1000EXP | 850G | Magic Stone Box Silver |
Desert
Along the way, you can see an event with Govan in Wildflower City.
If you reach the end and examine the portal, you will enter into two battles with four Estalia soldiers.
If you lose this battle, an H scene will occur.
If you win, you will have cleared Chapter 8.
- hot dog
- 500G
- 2x Energy Potion
- Magic Stone x 10
- 300G
- Casino coins x 1000
Monster
| monster | Experience point | money | Dropped Items |
| Earth Spirit | 81 EXP | 90G | Battle Technique (Thunder Dance I), Battle Technique (Dawn’s Light I), Rare Clay |
| Desert Scorpion | 96 EXP | 70G | Battle Technique (Needle Pierce I), Battle Technique (Moonlight Curtain I), Rare Clay |
| Venomous spider | 65 EXP | 80G | Combat Art (Enforce I), Combat Art (Etherfeet I), Rare Clay |
| Wind Spirit | 70 EXP | 120G | Battle Technique (Thunder Dance I), Battle Technique (Dawn’s Light I), Rare Clay |
| Kikimora of the Evil Eye (Legendary Monster) | 800 EXP | 3000G | Magic Stone Box Silver |
| Estalia Soldier x 4 (Boss) | 280 EXP | 320G | Lovesorasu, Mysterious Ore |
Episode 9: “Gray Snow”
Demon Realm
Go northwest of the village, and after the event with Ima, proceed from the northeast of the village.
In the flower field where Ima was, you can pick up the ” Nemophila Ring ” after the event, so collect it.
When you reach the end, you will automatically be transported to Estalia City.
- 1000G
- Magic II
- Nemophila Ring
- Omelette rice
- Grape Jelly
- Energy Potion
- 800G
- 500G
- Critical II
Monster
| monster | Experience point | money | Dropped Items |
| Petit Dragon | 100EXP | 90G | Battle Technique (Needle Pierce I), Battle Technique (Moonlight Curtain I), Mysterious Ore |
| Okorinbou | 80 EXP | 82G | Enforce I, Etherfeet I, Mysterious Ore |
| Shady Wolf | 78 EXP | 123G | Battle Technique (Thunder Dance I), Battle Technique (Dawn’s Light I), Mysterious Ore |
| Ice Spirit | 80 EXP | 105G | Battle Technique (Needle Pierce I), Battle Technique (Moonlight Curtain I), Mysterious Ore |
Estalia City
If you work at the members-only club in town, you can get ” High-Class Prostitute outfit ” after the event.
If you talk to Katche at the inn in the north, you can hear how to escape.
If you talk to the owner of the shop at the top of the ladder in the northwest of town, you can get a “counterfeit card” for 1000G .
Move to the slums in the southwest of the town and head to Menace’s room at the inn.
Leave the room and head to the woman being harassed by the drunken man to move to the waste dump.
The slum slut is freed halfway through the waste dump.
(It seems that this does not occur due to a bug in the current version 1.04)
- Synthesis Recipe IV (Hotel)
Waste disposal site
Moving the first lever to the left will allow you to move forward.
Moving the middle will allow you to get a treasure chest, and moving the right will cause dirty water to fall and damage you.
The second lever has a mechanism activation on the left, sewage in the middle, and a treasure chest on the right.
When you reach the back, you can choose how you obtain the Arc-en-Ciel.
If you choose “Make an old man’s dream come true,” you can obtain it in an H-event without paying money, and obtaining the Arc-en-Ciel will clear Episode 9.
- Party Pizza
- Mysterious Ore x23
- 3000G
Monster
| monster | Experience point | money | Dropped Items |
| Failure 197 | 84 EXP | 92G | Enforce I, Etherfeet I, Mysterious Ore |
| Failure 222 | 80 EXP | 90G | Battle Technique (Thunder Dance I), Battle Technique (Dawn’s Light I), Mysterious Ore |
| Failure 439 | 80 EXP | 88G | Mysterious Ore |
| Failure 254 | 80 EXP | 90G | Battle Technique (Needle Pierce I), Battle Technique (Moonlight Curtain I), Mysterious Ore |
Episode 10 “Aigis”
Desert Underground Passage
You will head to Harvey through the underground passage.
Once you leave the underground passage, you will be able to move to Area 6 in the desert.
Once you reach the rendezvous point, you will enter a boss battle.
Even if you lose this battle, the story will continue as is (is this a bug?).
After that, if you talk to Katche outside, you will be transported to the underground city.
- Mysterious Ore x20
- 3000G
- tomato juice
- Elixir
- Energy Potion
- Casino coins x 3000 (Great Thief’s Key)
Monster
| monster | Experience point | money | Dropped Items |
| Goblin Soldier | 90 EXP | 180G | Battle Technique (Thunder Dance I), Battle Technique (Dawn Light I), Crystal Shard |
| Golem | 200 EXP | 110G | Quartz fragment |
| Goblin Knight | 120 EXP | 250G | Enforce I, Etherfeet I, Crystal Shard |
| Goblin Magician | 100EXP | 150G | Battle Technique (Needle Pierce I), Battle Technique (Moonlight Curtain I), Crystal Fragment |
| Thunderbolt Gargoyle (Legendary Monster) | 1200EXP | 3500G | Refining Material Box |
| Machine soldier x 2 (Boss) | 540 EXP | 1000G | Super Love Solas |
Underground City Grantera
After talking to Ima, head to the north room where Disaster is.
After the event, sleep in the bed in the residential area and leave the room to head to the Central Plant.
Central Plant
All of your Now and Disaster abilities have been removed, so re-equip them.
To enter the sealed off area of Area 4, you need a “Security Key” that can be obtained from the treasure chest in the bottom left of Area 1, and inside you can fight legendary monsters.
If you enter the building in Area 5 and proceed forward alone with Astel, the two will join up and you will enter a boss battle.
If you lose this battle, an H-scene will occur, and if you win, you will have cleared Episode 10.
- 5000G
- Security Key
- 3000G
Monster
| monster | Experience point | money | Dropped Items |
| Administrator | 150 EXP | 250G | Enforce I, Etherfeet I, Crystal Shard |
| Salamandra | 190 EXP | 120G | Battle Technique (Thunder Dance I), Battle Technique (Dawn Light I), Crystal Shard |
| Heller | 180 EXP | 160G | Quartz fragment |
| Dennett | 175 EXP | 250G | Battle Technique (Needle Pierce I), Battle Technique (Moonlight Curtain I), Crystal Fragment |
| Rompers | 220 EXP | 120G | Quartz fragment |
| Reincarnation Caladrios (Legendary Monster) | 220 EXP | 180G | Refining Material Box |
| Mulholland Keim (Boss) | 2000 EXP | 3500G | Super Love Solas, MC Merical III |
Boss Mulholland Kaim
He has high overall firepower and uses area-of-effect attacks, so prepare area-of-effect healing skills.
Episode 11: The Wall that Divides the World
Enried and Onried, the Wheel of All Mind
You can get the “Ley Line Series” equipment at the start of episode 11.
If you are a virgin at this point, you can get the ” Synthesis Recipe VI ” and ” 60 Mythical Mithril ” as bonuses.
Examining the seat of the Arc-en-Ciel Falcon will take you to the full wheel.
Defeating the boss at the back of Enried on the left will allow you to enter Onried on the far right.
Defeating the boss of Onried will allow you to proceed beyond the central boundary corridor.
- Filia Robe
- Filia Grove
- Maximilian
- Hildur’s Sail
Monster
| monster | Experience point | money | Dropped Items |
| Jacks | 250 EXP | 120G | Battle Technique (Pain Attack II), Battle Technique (Heal Circle II), Crystal Fragment |
| Les Rages | 270 EXP | 300G | Battle Technique (Flame Dance II), Battle Technique (Healing Wind II), Crystal Fragment |
| Morax | 190 EXP | 280G | Crackshot II, Upper Lip II, Crystal Shard |
| Phenex | 350 EXP | 500G | Quartz fragment |
| Barbatos (Boss) | 2500EXP | 5000G | Super Love Thesaurus, Anti-Phase IV |
| Zepar | 260 EXP | 120G | Battle Technique (Lightning Roar II), Battle Technique (Charge Thrust II), Crystal Fragment |
| Ipos | 240 EXP | 300G | Battle Technique (Wind Dance II), Battle Technique (Blessed Rain II), Crystal Fragment |
| I am | 140 EXP | 560G | Battle Technique (Break Arrow II), Battle Technique (Wise Wolf’s Song II), Crystal Fragment |
| Naberius | 280 EXP | 130G | Phantom Mithril |
| Asmodeus | 2500EXP | 5000G | Super Love Solas, MC Merical IV |
Boss Barbatos
He doesn’t use any special attacks, but the enemy’s defense is high, so it’s likely to be a long-term battle.
Be sure to prepare recovery items and skills.
Boss Asmodeus
The left and right arms don’t have much HP difference from the main body, so it’s recommended to defeat them all at once using Ima’s “Blizzard” skill.
The Wheel of All Mind: Boundary Corridor
When you reach the end, you will enter a boss battle.
If you win this battle, you will have cleared Chapter 11.
If you proceed to Chapter 12, you will not be able to return to the town or dungeon, so if there are any events you want to collect, do them before defeating the boss.
Monster
| monster | Experience point | money | Dropped Items |
| Bifrons | 350 EXP | 450G | Battle Technique (Thunder Dance II), Battle Technique (Dawn’s Light II), Crystal Fragment |
| Olias | 160 EXP | 450G | Phantom Mithril |
| Gusion | 290 EXP | 300G | Battle Technique (Needle Pierce II), Battle Technique (Moonlight Curtain II), Crystal Fragment |
| Furcas | 140 EXP | 160G | Enforce II, Etherfeet II, Phantom Mithril |
| Michael (Boss) | 5000EXP | 3000G | Super Love Solas |
When you cut the boss Michael’s HP by about half, he will fully recover to 2000 and his behavior pattern will change.
He will give all allies a defense down, so be careful of your remaining HP.
Episode 12: “After that, no one saw the hero again”
Contaminated Forest – Great Cave
Talking to Menace will take you to a polluted forest.
At the back of the cavern you will enter a boss battle, and if you proceed after defeating it you will be transported to a dark space.
If you proceed north you will be automatically transported to the virtual world after an event.
Choices will be given during the conversation, but they will loop until you choose “Yes,” so choose “Yes.”
Monster
| monster | Experience point | money | Dropped Items |
| Strass | 170 EXP | 200G | Phantom Mithril |
| Focalor | 150 EXP | 180G | Phantom Mithril |
| Pulson | 140 EXP | 230G | Phantom Mithril |
| Ronove | 260 EXP | 190G | Phantom Mithril |
| Bael | 250 EXP | 170G | Phantom Mithril |
| Buell | 190 EXP | 560G | Phantom Mithril |
| Vigne | 295 EXP | 300G | Phantom Mithril |
| Astaroth (Boss) | 3500EXP | 5000G | Super Love Thesaurus, Anti-Phase V |
Boss Astaroth
The enemy’s attacks are not that powerful, probably because Aster is not there.
The skill “Evil Domination” will poison all allies, so use “Tailwind”.
Last Dungeon
First, head underground, defeat Amon, and activate the lever.
If you head to the upper floors, you will be able to pass through the ticket gates, and at the very bottom you will fight the final boss.
If you win, you will enter the ending after the event.
After the ending, you will be able to unlock the extra game and all memories.
Monster
| monster | Experience point | money | Dropped Items |
| Arroquel | 250 EXP | 250G | none |
| Dantalion | 200 EXP | 250G | none |
| Decarabia | 200 EXP | 250G | none |
| Raum | 200 EXP | 250G | none |
| Saleos | 200 EXP | 250G | none |
| Behemoth of All Creations (Legendary Monster) | 6000EXP | 7000G | Magic Stone Box Gold |
| Amon (Boss) | 4500EXP | 5000G | Super Love Thesaurus, Critical IV |
| ??? (First battle against the final boss) | 5000EXP | 5000G | none |
| ??? (Second final boss battle) | 0EXP | 0G | none |
Boss Amon
It’s “Reason for the End” skill will give all allies a defense down.
Since the damage of this attack is high, if you are in a pinch, stop attacking and focus on healing.
Boss ??? (First battle against the final boss)
When HP is reduced to about 90%, HP will recover to 3000 and behavior pattern will change.
The first form will inflict a weakened state on all allies, but will not use such powerful attacks.
The second form will use powerful area-of-effect attacks like Amon.
Boss ? ? ? (Second battle with the final boss)
*The difficulty has been lowered since version 1.10, when items can be used and confusion is no longer inflicted.
You will fight by controlling Aster and allies in a special state.
Use “HP Repair” and “MC Repair” appropriately to keep HP high.
“Destruction Cannon” has a defense-lowering effect, so use it aggressively.
Extra Dungeon
Heaven’s Edge
You can get there from the west side of the virtual space, and the story will progress even if you don’t go there. You can obtain powerful abilities called ” Awakening ” and ” Immovable” by climbing the stairs on the left and right.
After defeating Taweret in the Sanctuary, you can go further and fight the grandma in the restaurant.
*Ver1.05 fixes the bug that occurs after fighting the grandma in the restaurant.
Monster
| monster | Experience point | money | Dropped Items |
| Pair of Prophetas | 170 EXP | 200G | Battle Technique (Thunder Dance II), Battle Technique (Healing Wind II) |
| abyss | 170 EXP | 200G | Battle Technique (Flame Dance II), Battle Technique (Wind Dance II) |
| Angel | 170 EXP | 200G | Art of War (Pain Attack II), Art of War (Heal Circle II) , Art of War (Blessed Rain II), Art of War (Enforce II) |
| Heavenly Knight | 170 EXP | 200G | Battle Technique (Upper Lip II), Battle Technique (Needle Pierce II) |
| Taweret of the Sanctuary (Legendary Monster) | 5000EXP | 6000G | Refining Material Box |
| Cafeteria grandma (boss) | 5000EXP | 4000G | Critical IV, MC Merical V |
Blagden Mine
You can get there by obtaining the “Map of Blagden Mine” as a reward for defeating a legendary monster.
Please note that the warp to logarithmic space will not appear unless you use it in your item list.
If you have the “Pickaxe” that you can get at the entrance, you can get a magic stone inside.
If you lose the battle here, the H-scenes “Goblin Rape”, “Mimic Rape”, and “Roper Rape” will occur.
Monster
| monster | Experience point | money | Dropped Items |
| Ogre Evil | 170 EXP | 200G | Battle Technique (Pain Attack II), Battle Technique (Lightning Roar II) |
| Gag Evil | 170 EXP | 200G | Combat Technique (Enforce II), Combat Technique (Heal Circle II) |
| Troll – Evil | 170 EXP | 200G | Battle Tactics (Charge Thrust II), Battle Tactics (Ether Feat II) |
| Martens Gorilla Evil | 170 EXP | 200G | Battle Technique (Thunder Dance II), Battle Technique (Healing Wind II) |
| Master of Miasma: Evil | 2500EXP | 5000G | Super Love Solas, Agility IV |
Ghost Ship
Defeat 11 legendary monsters and talk to the monster grandfather to get the “Ghost Ship Journal”.
Use it in your item list to go from Logarithmic Space.
Two of the legendary monsters can be fought in Episode 12, when you can no longer go to Logarithmic Space,
so is it only possible to go there from the second playthrough onwards?
- Radiant Shield
- Radiant Armor
Monster
| monster | Experience point | money | Dropped Items |
| Amabie | 180 EXP | 200G | Battle Technique (Pain Attack III), Battle Technique (Lightning Roar III) |
| Nautilus | 180 EXP | 200G | Combat Technique (Enforce III), Combat Technique (Heal Circle III) |
| Capella | 180 EXP | 200G | Battle Technique (Charge Thrust III), Battle Technique (Ether Feet III) |
| Ancient fish | 180 EXP | 200G | Battle Technique (Needle Pierce III), Battle Technique (Upper Lip III) |
| Creation | 180 EXP | 200G | Battle Technique (Wolf Song III), Battle Technique (Moonlight Curtain III) |
| Grief Bouquet | 2000 EXP | 3000G | none |
| Dutchman | 3500EXP | 4000G | Super Love Thesaurus, Power IV |
| Eldritch | 3500EXP | 4000G | Super Love Thesaurus, Magic IV |
| Chaos Kraken (Legendary Monster) | 7000EXP | 8000G | Magic Stone Box Gold |
Arena
Implemented in Wildflower City after version 1.10.
After clearing the intermediate level individual battle, you can challenge the team battle.
In the team battle, you can fight two legendary demon brothers.
If you clear the advanced individual match with Aster, you can get the Radiant Shield,
if you win with Ima or Disaster, you can get the Princess Dress.
If you clear the team match, you can get the Radiant Shield or Princess Gloves.
H scene list and conditions
H-events with unclear conditions
Stun Rape 3
You can fight Goblin Soldiers and Mimics again by going to the place where you defeated them, and after joining Disaster you can collect all of their Stun Rapes.
Goblin Rape, Mimic Rape, Roper Rape
You can go to Blagden Mine by using the “Map of Blagden Mine” that can be obtained by defeating legendary monsters in your item list.
This dungeon will occur if you are defeated by a small enemy.
Ero Cheki
Occurs when you talk to the Govan Casino broker while wearing idol clothes.
From version 1.04, you can get idol clothes by exchanging them for prizes at the casino.
Lover Play
If you have the “High-class prostitute outfit” or “Waitress outfit”, you
will be able to enter the high-class brothel in the old town, and an event will occur if you work there.
This occurs in the Wildflower City arena implemented in BF Yakyuken 3
ver. 1.10 and later. After losing a battle, you can move on to BF Yakyuken by choosing “I will not pay.”
Aster
| H-Scene | Conditions |
| Episode 1: Defeat of Ruta | After being defeated by Luta in episode 1, he chooses Aster. |
| Episode 2: Perverted Prison Guard | Automatically occurs during the story |
| Episode 4: Underground Auction – Asterside | After losing the boss battle in episode 4, choose Aster |
| Episode 5/Charise | In the last event of Episode 5, choose “I followed Koopa Koopa” |
| Episode 10: Mulholland vs. Asterside | Defeat the boss in episode 10 |
| toilet | Use the toilet in your room |
| Shower Normal | Shower in your room |
| After shower creampie | Take a shower in your room after creampie |
| Masturbation | Masturbating in my bed |
| Masturbation/in my room | Masturbating in my room |
| Childbirth (dream?) | Giving birth in your own bed during pregnancy |
| Exhibitionist masturbation | After unlocking the naked wandering ability at H-EXP level 19, you can sleep in your bed without masturbating. |
| Fainting rape 1 | Defeated by Goblin Soldier and choose Astel |
| Fainting Rape 2 | Defeat Mimic and choose Aster |
| Fainting Rape 3 | After being defeated by Goblin Soldier or Mimic, choose Astel. After defeating him in the story, you can fight him again by heading to the location where the boss was. |
| Goblin Rape | Lose the battle at Blagden Mines |
| Mimic Rape | Lose the battle at Blagden Mines |
| Roper Rape | Lose the battle at Blagden Mines |
| Public toilet cleaning 1 | Working part-time in a public restroom |
| Public toilet cleaning 2 | Working part-time in a public restroom |
| Peeping/Public Baths | Enter a public bath |
| Undressing 1/Public bath | Work part-time at a public bathhouse. Part-time jobs are unlocked as the story progresses. |
| Undressing 2/Public Bath | Working part-time at a public bath |
| Undressing 3/Public Bath | Working part-time at a public bath |
| Drawing model 1 | Model for the Magic Academy’s Art Club |
| Drawing model 2 | Model for the Magic Academy’s Art Club |
| Drawing model 3 | Model for the Magic Academy’s Art Club |
| Balloon distribution | Working at the night pool at Govan Under Resort |
| Erocheki 1 | Occurred while working part-time as a middleman at Govan Casino |
| Erocheki 2 | Occurred while working part-time as a middleman at Govan Casino |
| Orphanage Supervisor/Undressing 1 | Talk to the sister at the orphanage in the slums |
| Orphanage Supervisor/Undressing 2 | Talk to the sister at the orphanage in the slums |
| Orphanage Supervisor/Erotic Bitch Blowjob | Talk to the sister at the orphanage in the slums |
| Orphanage Supervisor/Erotic Kid Fuck | Talk to the sister at the orphanage in the slums |
| pole dance | Work at a members-only club in Estalia City |
| Love hotel 1 | Working in a slum |
| Love hotel 2 | When working at a slum brothel, he chooses to be a fake hero |
| Lover Play Good | Occurred at a high-end brothel in the old town |
| Lover Play Butt | Occurred at a high-end brothel in the old town |
| BF Yakyuken 1/Kiss | Lose 1 game of BF Yakyuken at a public bath |
| BF Yakyuken 1/Dense blowjob | Lose twice in BF Yakyuken at the public baths |
| BF Yakyuken 1/Deep Throat | Lose 3 times in BF Yakyuken at the public baths |
| BF Yakyuken 1/Doggy style | Lose 4 times in BF Yakyuken at the public baths |
| BF Yakyuken 1/Sandwich Fuck | Lose 5 times in BF Yakyuken at the public baths |
| BF Yakyuken 2/Kiss | Lose one game of BF Yakyuken in the changing room at Govan Under Resort |
| BF Yakyuken 2/Dense blowjob | Lose twice in BF Yakyuken in the changing room at Govan Under Resort |
| BF Yakyuken 2/Deep Throat | Lose 3 times in BF Yakyuken in the changing room at Govan Under Resort |
| BF Yakyuken 2/Doggy Style | Lose 4 games in BF Yakyuken in the changing room at Govan Under Resort |
| BF Yakyuken 2/Sandwich Fuck | Lose 5 times in BF Yakyuken in the changing rooms at Govan Under Resort |
| BF Yakyuken 3/Fellatio | Occurs in the Wildflower City Arena |
| BF Yakyuken 3/Titty fuck | Occurs in the Wildflower City Arena |
| BF Yakyuken 3/Sumata | Occurs in the Wildflower City Arena |
| BF Yakyuken 3/Sex | Occurs in the Wildflower City Arena |
| BF Yakyuken 3/Spread-legged caressing | Occurs in the Wildflower City Arena |
| BF Yakyuken/Aftermath | Lose 5 times in BF Yakyuken |
Ima
| H-Scene | Conditions |
| Episode 1: Defeat of Ruta | After being defeated by Ruta in episode 1, he chooses Ima. |
| Episode 2: Defeat of the Real Monster | Defeated during a rematch with the mysterious enemy from episode 2 |
| Episode 4: Underground Auction Nowside | After losing the boss battle in episode 4, choose Ima |
| Episode 10: Mulholland vs. Imacide | Defeat the boss in episode 10 |
| toilet | Use the toilet in your room |
| Shower Normal | Shower in your room |
| After shower creampie | Take a shower in your room after creampie |
| Masturbation | Masturbating in my bed |
| Childbirth (dream?) | Giving birth in your own bed during pregnancy |
| Exhibitionist masturbation | After unlocking the naked wandering ability at H-EXP level 19, you can sleep in your bed without masturbating. |
| Fainting rape 1 | Defeated by Goblin Soldier and choose Ima |
| Fainting Rape 2 | Defeat Mimic and choose Aster |
| Fainting Rape 3 | Choose Ima after being defeated by Goblin Soldier or Mimic |
| Goblin Rape | Lose the battle at Blagden Mines |
| Mimic Rape | Lose the battle at Blagden Mines |
| Roper Rape | Lose the battle at Blagden Mines |
| Public toilet cleaning 1 | Working part-time in a public restroom |
| Public toilet cleaning 2 | Working part-time in a public restroom |
| Peeping/Public Baths | Enter a public bath |
| Undressing 1/Public bath | Working part-time at a public bath |
| Undressing 2/Public Bath | Working part-time at a public bath |
| Undressing 3/Public Bath | Working part-time at a public bath |
| Drawing model 1 | Model for the Magic Academy’s Art Club |
| Drawing model 2 | Model for the Magic Academy’s Art Club |
| Drawing model 3 | Model for the Magic Academy’s Art Club |
| Balloon distribution | Working at the night pool at Govan Under Resort |
| Erocheki 1 | Occurred while working part-time as a middleman at Govan Casino |
| Erocheki 2 | Occurred while working part-time as a middleman at Govan Casino |
| Orphanage Supervisor/Undressing 1 | Talk to the sister at the orphanage in the slums |
| Orphanage Supervisor/Undressing 2 | Talk to the sister at the orphanage in the slums |
| Orphanage Supervisor/Erotic Bitch Blowjob | Talk to the sister at the orphanage in the slums |
| Orphanage Supervisor/Erotic Kid Fuck | Talk to the sister at the orphanage in the slums |
| pole dance | Work at a members-only club in Estalia City |
| Love hotel 1 | Working in a slum |
| Love hotel 2 | When working at a slum brothel, he chooses to be a fake hero |
| Lover Play Good | Occurred at a high-end brothel in the old town |
| Lover Play Butt | Occurred at a high-end brothel in the old town |
| BF Yakyuken 1/Kiss | Lose 1 game of BF Yakyuken at a public bath |
| BF Yakyuken 1/Dense blowjob | Lose twice in BF Yakyuken at the public baths |
| BF Yakyuken 1/Deep Throat | Lose 3 times in BF Yakyuken at the public baths |
| BF Yakyuken 1/Doggy style | Lose 4 times in BF Yakyuken at the public baths |
| BF Yakyuken 1/Sandwich Fuck | Lose 5 times in BF Yakyuken at the public baths |
| BF Yakyuken 2/Kiss | Lose one game of BF Yakyuken in the changing room at Govan Under Resort |
| BF Yakyuken 2/Dense blowjob | Lose twice in BF Yakyuken in the changing room at Govan Under Resort |
| BF Yakyuken 2/Deep Throat | Lose 3 times in BF Yakyuken in the changing room at Govan Under Resort |
| BF Yakyuken 2/Doggy Style | Lose 4 games in BF Yakyuken in the changing room at Govan Under Resort |
| BF Yakyuken 2/Sandwich Fuck | Lose 5 times in BF Yakyuken in the changing rooms at Govan Under Resort |
| BF Yakyuken 3/Fellatio | Occurs in the Wildflower City Arena |
| BF Yakyuken 3/Titty fuck | Occurs in the Wildflower City Arena |
| BF Yakyuken 3/Sumata | Occurs in the Wildflower City Arena |
| BF Yakyuken 3/Sex | Occurs in the Wildflower City Arena |
| BF Yakyuken 3/Spread-legged caressing | Occurs in the Wildflower City Arena |
| BF Yakyuken/Aftermath | Lose 5 times in BF Yakyuken |
Disaster
| H-Scene | Conditions |
| Episode 3: Defeat of Gloria | Defeated by Phantom in episode 3 |
| Episode 4: Underground Auction Disaster Side | After losing the boss battle in Episode 4, choose Disaster |
| Episode 10: Disaster Side of the Battle of Mulholland | Defeat the boss in episode 10 |
| toilet | Use the toilet in your room |
| Shower Normal | Shower in your room |
| After shower creampie | Take a shower in your room after creampie |
| Masturbation | Masturbating in my bed |
| Childbirth (dream?) | Giving birth in your own bed during pregnancy |
| Exhibitionist masturbation | After unlocking the naked wandering ability at H-EXP level 19, you can sleep in your bed without masturbating. |
| Fainting rape 1 | Choose Disaster after being defeated by Goblin Soldier or Mimic |
| Fainting Rape 2 | Choose Disaster after being defeated by Goblin Soldier or Mimic |
| Fainting Rape 3 | Choose Disaster after being defeated by Goblin Soldier or Mimic |
| Goblin Rape | Lose the battle at Blagden Mines |
| Mimic Rape | Lose the battle at Blagden Mines |
| Roper Rape | Lose the battle at Blagden Mines |
| Public toilet cleaning 1 | Working part-time in a public restroom |
| Public toilet cleaning 2 | Working part-time in a public restroom |
| Peeping/Public Baths | Enter a public bath |
| Undressing 1/Public bath | Working part-time at a public bath |
| Undressing 2/Public Bath | Working part-time at a public bath |
| Undressing 3/Public Bath | Working part-time at a public bath |
| Drawing model 1 | Model for the Magic Academy’s Art Club |
| Drawing model 2 | Model for the Magic Academy’s Art Club |
| Drawing model 3 | Model for the Magic Academy’s Art Club |
| Balloon distribution | Working at the night pool at Govan Under Resort |
| Erocheki 1 | Occurred while working part-time as a middleman at Govan Casino |
| Erocheki 2 | Occurred while working part-time as a middleman at Govan Casino |
| Orphanage Supervisor/Undressing 1 | Talk to the sister at the orphanage in the slums |
| Orphanage Supervisor/Undressing 2 | Talk to the sister at the orphanage in the slums |
| Orphanage Supervisor/Erotic Bitch Blowjob | Talk to the sister at the orphanage in the slums |
| Orphanage Supervisor/Erotic Kid Fuck | Talk to the sister at the orphanage in the slums |
| pole dance | Work at a members-only club in Estalia City |
| Love hotel 1 | Working in a slum |
| Love hotel 2 | When working at a slum brothel, he chooses to be a fake hero |
| Lover Play Good | Occurred at a high-end brothel in the old town |
| Lover Play Butt | Occurred at a high-end brothel in the old town |
| BF Yakyuken 1/Kiss | Lose 1 game of BF Yakyuken at a public bath |
| BF Yakyuken 1/Dense blowjob | Lose twice in BF Yakyuken at the public baths |
| BF Yakyuken 1/Deep Throat | Lose 3 times in BF Yakyuken at the public baths |
| BF Yakyuken 1/Doggy style | Lose 4 times in BF Yakyuken at the public baths |
| BF Yakyuken 1/Sandwich Fuck | Lose 5 times in BF Yakyuken at the public baths |
| BF Yakyuken 2/Kiss | Lose one game of BF Yakyuken in the changing room at Govan Under Resort |
| BF Yakyuken 2/Dense blowjob | Lose twice in BF Yakyuken in the changing room at Govan Under Resort |
| BF Yakyuken 2/Deep Throat | Lose 3 times in BF Yakyuken in the changing room at Govan Under Resort |
| BF Yakyuken 2/Doggy Style | Lose 4 games in BF Yakyuken in the changing room at Govan Under Resort |
| BF Yakyuken 2/Sandwich Fuck | Lose 5 times in BF Yakyuken in the changing rooms at Govan Under Resort |
| BF Yakyuken 3/Fellatio | Occurs in the Wildflower City Arena |
| BF Yakyuken 3/Titty fuck | Occurs in the Wildflower City Arena |
| BF Yakyuken 3/Sumata | Occurs in the Wildflower City Arena |
| BF Yakyuken 3/Sex | Occurs in the Wildflower City Arena |
| BF Yakyuken 3/Spread-legged caressing | Occurs in the Wildflower City Arena |
| BF Yakyuken/Aftermath | Lose 5 times in BF Yakyuken |
Others
| H-Scene | Conditions |
| Secret auction | Lose the boss battle in episode 4 |
| Episode 8: Estalia soldiers defeated | Lose the battle against the Estalia soldiers in episode 8 |
| Episode 9: Standing Together | In episode 9, choose “Make the old man’s dream come true” |
| Goblin Rape/All | Lose the battle at Blagden Mines |
Various data
Skill List and Effects
Aster
| skill | Acquisition Level | effect |
| Heal | Lv2 | Recovers about 35 HP for a single ally |
| Treat | Lv7 | Removes poison from a single ally |
| recovery | Lv17 | Removes poison and deadly poison from all allies |
Ima
| skill | Acquisition Level | effect |
| Ice Needle | Lv2 | Deals about 10 damage to all enemies |
| Raise | Lv7 | Revives a single stunned ally |
| Arc Saber | event | Deals about 35 damage to a single enemy and doubles the damage if Imma is poisoned. |
| Fire Lance | Lv10 | Deals 43 damage to a single enemy. |
| Blizzard | Lv19 | Deals 38 damage to all enemies. |
Disaster
| skill | Acquisition Level | effect |
| Tailwind | Initial Acquisition | Prevents all allies from being poisoned for 3 turns |
| Stealth Turn | Lv12 | Greatly reduces the targeting rate of a single ally for 3 turns. |
| Dispel | Lv24 | Removes the buffs from a single enemy. |
Legendary monster locations & strategies
・Anraku’s Bone Serpent
After joining Disaster, you can fight at the end of the ladder in the sewer.
It will inflict poison and deadly poison on all allies. Deadly poison reduces a lot of HP and doesn’t count against Ima’s “Arc Saber” damage multiplier,
so it’s best to use Disaster’s “Tailwind” skill to prevent it.
・Dark Knight of Retribution
You can fight him by examining the iron bars at the guardhouse at Loren River Gate.
He uses a skill called “Prison of Lamentation” to lower the defense of a single ally.
He often uses powerful single-target and all-area attacks, so you’ll want to prepare plenty of recovery skills and recovery items to keep his HP high.
・Bottomless Cerberus
You can fight him in the cave in Area 5 on the road to the dam.
He inflicts a deadly poison on all allies and also uses a full-party attack.
Use “Tailwind” to prevent poison and use a full-party recovery skill such as “Heal Circle” when his HP gets low.
・Shoujo of the Bright Light
You can fight him in the Water Cave.
He will inflict poison with his “Slash” skill, so use “Tailwind”.
His “Frightening Scream” has a chance of inflicting a stun on all allies, but if you’re ahead of your opponent, you can get through it without any drawbacks.
“Into the Stone” has a chance of causing instant death to all allies, but is this a low chance?
It’s a good idea to prepare some resurrection items just in case.
・Kikimora of the Evil Eye
You can fight him in the desert.
Has skills that inflict confusion on all allies and lower the defense of a single ally.
Can be nullified with the “Ring of Evil Reversal” that can be exchanged at the casino.
You can get it from the blue treasure chest south of the legendary monster’s location.
You can exchange 1000 casino coins for equipment for three allies.
It doesn’t have much Health, so it’s recommended to start a short battle.
・Thunderbolt Gargoyle
You can fight him in the underground desert passage.
His defense is high, so Disaster attacks are hard to get through.
Use the inherited weapon skill “Moonlight Curtain” to provide support and recovery.
Be careful, as the skill “Into the Stone” has a low chance of causing instant death.
・Caradrios of Reincarnation
Can be fought at the Central Plant.
It will launch an HP absorbing attack called “Wind Slash”.
In order to prevent the enemy from recovering HP, increase your allies’ defense power with “Moonlight Curtain” etc.
・Brother Demon Lords Kinkaku & Ginkaku
They appear in the third battle of the team battle in the arena.
You can challenge the team battle once one of your party members has cleared the intermediate individual battle.
They will inflict deadly poison, so be sure to prepare equipment and skills to deal with them.
・Giltabulu the Glutton
From logarithmic space, head to the future of Grantaire (the ruins you visited during the crash landing).
If you have the “Great Thief’s Key” in the area with the long bridge in the north-central center of the second area of the ruins,
obtain the “Rope Ladder” from inside the treasure chest that can be opened.
If you examine the circle mark in the area before the boss battle and go down, you can fight a legendary monster.
It uses a group attack called “Rampage” that reduces defense, and a skill called “Invitation to Darkness” that puts the enemy in darkness.
・Taweret of the Sanctuary
You can fight him on the top floor of the Celestial Bridge (added in ver.1.04).
He will inflict various abnormal conditions, such as weakened states.
He uses single-target attacks frequently, so be careful not to let allies with low defenses fall.
・Universal Behemoth
You can fight him in the northeast of the rest area in the last dungeon.
He has very high firepower and is quite fast, so make sure you strengthen your defenses as much as possible.
・Chaos Kraken
Defeat 11 legendary monsters and talk to the monster grandfather to get there.
You can fight it on the ghost ship.
It is the strongest enemy in the game, so you’ll want to prepare the highest grade equipment.
It will inflict deadly poison, so be sure to take measures with equipment and skills.
Ability
| ability | Prerequisites | effect |
| Meteor Sword | Initial Acquisition | At the start of battle, there is a 12% chance of using a special move. |
| Ice Needle Thunderbolt | Initial Acquisition | At the start of battle, there is a 12% chance of using a special move. |
| Heavenly Flying Attack – Destruction | Initial Acquisition | At the start of battle, there is a 12% chance of using a special move. |
| Beginner | shop | When HP is over 50%, the maximum MC increases slightly. |
| strong | H EXP Reward | When HP is above 85%, damage dealt increases by 10% |
| Potential | H EXP Reward | When HP is below 70%, damage dealt is increased by 20% |
| adversity | H EXP Reward | Increases damage dealt by 30% when HP is below 50% |
| Unyielding | H EXP Reward | Reduces damage taken by 30% when HP is below 30% |
| instinct | H EXP Reward | Speed doubles when HP is below 30% |
| Excitement | H EXP Reward | When MC is over 80%, damage dealt increases by 30% |
| Awakening | Heaven’s Edge Treasure Chest | When HP is above 70%, damage taken is increased by 30% |
| Immobility | Defeat the enemies in the basement of the Guild Hall | When HP is above 70%, damage taken is reduced by 30% |
| Amazing | ??? | When HP is above 95%, critical rate increases by 30% |
| Antiphase I | Episode 2 Boss Drop | Increase damage dealt by 10% and damage received by 10% |
| Antiphase II | Episode 4 Boss Drop | Increase damage dealt by 20% and damage received by 20% |
| Antiphase III | Episode 7 Boss Drop | Increase damage dealt by 30% and damage received by 30% |
| Anti-Phase IV | Episode 11 Boss Drop | Increase damage dealt by 40% and damage received by 40% |
| Anti-Phase V | Episode 12 Boss Drop | Increase damage dealt by 50% and damage received by 50% |
| MC Gain Ⅰ | Treasure Chest | Slightly increase maximum MC value |
| MC Gain II | Treasure Chest | Moderately increase maximum MC value |
| MC Gain III | ??? | Greatly increase maximum MC value |
| MC Gain IV | Ghost Ship Area 2 | Greatly increase maximum MC value |
| MC Gain V | Blagden Mines Boss Room | Super increase maximum MC value |
| MC Merical I | Logarithmic Space Treasure Chest | MC playback rate increases slightly |
| MC Merical II | Episode 6 Boss Drop | Moderate increase in MC playback rate |
| MC Merical III | Episode 10 Boss Drop | MC playback rate increases dramatically |
| MC Merical IV | Episode 11 Boss Drop | MC playback rate increases dramatically |
| MC Merical V | Cafeteria Granny Drop | MC playback rate will increase dramatically |
| Power I | shop | Attack power increases slightly |
| Power II | shop | Moderately increases attack power |
| Power III | shop | Attack power increases greatly |
| Power IV | Dutchman Drop | Attack power increases greatly |
| Magic I | shop | Magic power increases slightly |
| Magic II | shop | Magical power increases moderately |
| Magic III | shop | Magical power increases greatly |
| Magic IV | Eldlich Drop | Magical power increases greatly |
| Agility I | shop | Slightly increases evasion ability |
| Agility II | shop | Moderately increases evasion ability |
| Agility III | shop | Greatly increases evasion ability |
| Agility IV | Blagden Mines Boss Drop | Greatly increase evasion ability |
| Critical I | shop | Slightly increases critical chance |
| Critical II | Demon Realm Treasure Chest | Slightly increases critical chance |
| Critical III | shop | Critical hit rate increases dramatically |
| Critical IV | Cafeteria Granny Drop | Greatly increases critical chance |
| Dex I | shop | Skill increases slightly. |
| Dex II | shop | Skill increases slightly. |
| Dex III | shop | Skills will increase greatly |
| Dex IV | ??? | Skills will increase greatly. |
List of conversations
| conversation | Number of Episodes | Acquisition conditions |
| 001 “Friends!” | Episode 1 | At the start of the game |
| 002 “Intentions?” | Episode 1 | When we meet up |
| 003: Are you actually a young lady? | Episode 1 | After the explanation of inheritance at the weapon shop |
| 004 “Normal is best” | Episode 1 | Receive combat training in the basement of the Guild Hall |
| 005 “I love animals” | Episode 1 | Talk to the former hunter on the wall |
| 006: “Portals are…” | Episode 1 | The timing of crossing the bridge in Flowing Flower Forest Area 2 |
| 007 “Beware of perverts” | Episode 1 | Defeat the Goblin Soldier |
| 008 “Prehistoric Civilization” | Episode 1 | When you return to the old town through the portal |
| 009 “Distance is difficult” | Episode 1 | After breaking up with Imma |
| 010 “Where’s everyone?” | Episode 1 | Entering other rooms through a window in a company dormitory at night |
| 011 “Something’s wrong” | Episode 1 | Reaching the communal bath at night in the employee dormitory |
| 012 “Are you a Tsundere?” | Episode 1 | Reaching the communal bath at night in the employee dormitory |
| 013 “Adults are dirty” | Episode 2 | Meet Ima in the president’s office |
| 014 “Everyone’s Hero” | Episode 2 | Meet Ima in the president’s office |
| 015 “Nostalgia Crusher” | Episode 2 | Enter Mountain Path Area 2 |
| 016 “Aren’t you scared? No!” | Episode 2 | On the way to Mountain Area 3 |
| 017 “I will punish you with the Gyokuhyun punishment!” | Episode 2 | After returning to the old town through the portal |
| 018 “Approximate Trust Value” | Episode 2 | After returning to the old town through the portal |
| 019 “The world is bad!” | Episode 2 | Enter the sewer area after being imprisoned |
| 020 “Surprisingly skillful” | Episode 2 | Enter the sewer area after being imprisoned |
| 021 “Reporter’s spirit?” | Episode 2 | Continue through the sewer area |
| 022 “Bloody Bully” | Episode 2 | Continue through the sewer area |
| 023 “Compensatory Action” | Episode 3 | Does this occur before the conversation with Ilse? |
| 024 “The ultimate way to kill time” | Episode 3 | Does this occur before the conversation with Ilse? |
| 025 “My head is a mess” | Episode 3 | Occurs after a conversation with Ilse |
| 026 “I had a good idea” | Episode 3 | Occurs after a conversation with Ilse |
| 027 “Little Devil Hair” | Episode 3 | Occurs after obtaining a Blue Ribbon |
| 028 “Teacher Hair” | Episode 3 | Occurs after obtaining a Blue Ribbon |
| 029 “What was the perpetrator’s purpose?” | Episode 3 | Originates in sewers |
| 030 “Macro and Micro Perspectives” | Episode 3 | Occurs in Sewer Area 4 |
| 031 “The Mismatched Duo” | Episode 3 | Occurred at the Magic Academy |
| 032 “The Stable Punchline” | Episode 3 | Occurs after joining Disaster |
| 033 “Price” | Episode 3 | Occurs after joining Disaster |
| 034 “Beautiful Girl Hair” | Episode 3 | Occurs after joining Disaster |
| 035 “I know about myself.” | Episode 3 | Occurs after heading to Lane’s lab |
| 036 “Be scared for other people” | Episode 3 | Occurs in the Catacombs |
| 037 “I’m not afraid of monsters” | Episode 3 | Occurs in Catacombs Area 3 |
| 038 Which is your true form? | Episode 4 | Occurs at the start of Episode 4 |
| 039 “The Secret of Furoshiki” | Episode 4 | Occurs in Sewer Area 9 |
| 040 “I like machines” | Episode 4 | Occurred in an underground parking lot |
| 041 “Can I trust you?” | Episode 4 | Occurred at Govan Under Resort |
| 042 “That will probably work better.” | Episode 4 | Occurred on the top floor of Govan Andar Resort Hotel |
| 043 “Who is Princess Charize?” | Episode 4 | Occurred southeast of the Govan Stage venue |
| 044 “A selfish body that gets caught” | Episode 4 | Occurs in ventilation duct area 2 |
| 045 “Qualities of a Hero” | Episode 4 | Occurs in dungeon area 6 |
| 046 “What do you want?” | Episode 5 | Occurs at the start of Episode 5 |
| 047 “Exciting Portal” | Episode 5 | Occurred at the Loren River Gate |
| 048 “Fluffy Addiction” | Episode 5 | Occurred in the Dowswell area |
| 049 “The monster is a mushroom” | Episode 5 | Occurred in the Dowswell area |
| 050 “Something I really want to know” | Episode 5 | Automatically occurs when heading west of Berg Village |
| 051 “Interracial Mixed Party” | Episode 5 | Occurs after the conversation event with the monster grandfather |
| 052 “Captain Harry” | Episode 6 | Occurs at the start of Episode 6 |
| 053 “The former princess is miserly” | Episode 6 | Occurred on the Arc-en-Ciel |
| 054 “Why air travel?” | Episode 6 | Occurred on the Arc-en-Ciel |
| 055 “Mysterious Sphere” | Episode 6 | Occurs on a beach where an emergency landing occurred |
| 056 “Was this world a sheet?” | Episode 6 | Occurs after a conversation with Osmund |
| 057 “Time travel?” | Episode 6 | Occurs after a conversation with Osmund |
| 058 “If he panics, punch him!” | Episode 6 | Occurs after a conversation with Osmund |
| 059 “Crash Site” | Episode 7 | Occurs during escape from the Arc-en-Ciel |
| 060 “As long as I have magic power” | Episode 7 | Occurs during escape from the Arc-en-Ciel |
| 061 “Where’s Astel?” | Episode 7 | Occurred on the road leading to the dam |
| 062 “Stay alive!” | Episode 7 | Occurred on the road leading to the dam |
| 063 “Showy Parents and Children” | Episode 8 | Occurs at the start of Episode 7 |
| 064 “Reminiscence Sermon” | Episode 7 | Occurs when boarding a train at Grand Terre Station |
| 065 “Suspicious Town” | Episode 8 | Occurred on a train |
| 066 “Three Exciting Sisters” | Episode 8 | Talk to the man at the train stop where you got off |
| 067 “What are you talking about?” | Episode 8 | Occurs in the Water Cave |
| 068 “Holiday as a Girl” | Episode 8 | Occurs in Water Cave Area 3 |
| 069 “Meddlesome Grandmother” | Episode 8 | Occurs in the desert |
| 070 “If we’re together, it’s not scary” | Episode 9 | Occurs at the beginning of Episode 9 |
| 071 “I’m still a cheapskate” | Episode 9 | Occurs at the beginning of Episode 9 |
| 072 “Even if it’s inconvenient, it’s still my hometown” | Episode 9 | Occurred in the Demon Realm |
| 073 “What needs to be done now” | Episode 9 | Occurs in Estalia City |
| 074 “Time Paradox” | Episode 9 | Occurs when talking to the soldier in the northeast of Estalia City. |
| 075 “The True Identity of Katche” | Episode 9 | Occurs after a conversation with Katche |
| 076 “The key is to breathe through your mouth” | Episode 9 | Occurs in slums |
| 077 “Cool Beauty?” | Episode 9 | Occurs after talking to a street vendor in the slums |
| 078 “Because I have the courage to climb.” | Episode 9 | Generated at waste disposal sites |
| 079 “A roundabout apology” | Episode 10 | Occurs at the beginning of episode 10 |
| 080 “Time Leap” | Episode 10 | Occurs at the beginning of episode 10 |
| 081 “Low heat please” | Episode 10 | Occurs in an underground desert passage |
| 082 “Another Way of Coexistence and Prosperity” | Episode 10 | Occurs after a battle with a mechanical soldier. |
| 083 “Suffering” | Episode 10 | Occurs when you proceed south after fighting the mechanical soldier. |
| 084 “The deadline is fast approaching” | Episode 10 | Occurs when you proceed south after fighting the mechanical soldier. |
| 085 “The Exit is in the Darkness” | Episode 10 | Occurs in the underground city of Grantera |
| 086 “It’s out of sight” | Episode 10 | Occurs in the underground city of Grantera |
| 087 “Lots of flowers” | Episode 10 | Talk to the robot in the central area of the underground city of Grantera |
| 088 “Strong-boned Family” | Episode 10 | Occurs when talking to Ilse and Kacche in the underground city of Grantera. |
| 089 “Mother’s Voice” | Episode 10 | Occurs in the underground city of Grantera |
| 090 “Butterfly Effect” | Episode 10 | Occurs at Central Plant |
| 091 “A rather serious problem for me personally.” | Episode 11 | Occurs at the start of episode 11 |
| 092 “Lyra’s Weapon” | Episode 11 | Occurs when all wheels arrive |
| 093 “If the geomagnetic field disappears…” | Episode 11 | Occurs on all wheels? |
| 094 “A lonely room” | Episode 12 | Occurs at the start of episode 12 |
| 095 “The Hero’s Wish” | Episode 12 | Occurs upon arrival at contaminated forest |
| 096 “Voice” | Episode 12 | Did it occur in contaminated forests? |
| 097 “I’m tone deaf” | Episode 12 | Occurs in contaminated forests |
| 098 “Goaki Virtual World” | Episode 12 | Occurs in the virtual world |
List of Weapon Techniques and Effects
| Weapon Combat Skills | effect |
| Battle Techniques (Pain Attack I-III) | Increases attack power and decreases defense power (up to 3 stacks possible) |
| Battle Techniques (Lightning Roar I-III) | After a normal attack, a follow-up attack occurs that depends on magical power. |
| Battle Techniques (Enforce I-III) | Increases the number of attacks |
| Battle Techniques (Heal Circle I to III) | Heals all allies |
| Battle Technique (Charge Thrust I-III) | Charge your magic and unleash a powerful attack on all enemies. |
| Battle Techniques (Etherfeet I-III) | Consume 30% of max HP to recover MC for all allies. |
| Battle Techniques (Flame Dance I to III) | Attacks 2 random enemies with fire magic. |
| Battle Techniques (Wind Dance I to III) | Wind magic attack on all enemies |
| Battle Techniques (Thunder Dance I to III) | Wind magic attack on all enemies |
| Battle Techniques (Healing Wind I-III) | Heals a single ally |
| Battle Techniques (Blessed Rain I-III) | Slightly heals all allies |
| Battle Techniques (Dawn I-III) | Heals all allies and removes stun |
| Battle Techniques (Crack Shot I-III) | Increased damage against tough enemies |
| Battle Techniques (Break Arrow I-III) | Reduces the defense of a single enemy when attacking |
| Battle Technique (Needle Pierce I-III) | Random attack on 4 enemies & Critical Rate Reduction |
| Battle Techniques (Upper Lip I-III) | Increased damage against soft enemies |
| Battle Techniques (Wise Wolf’s Song I-III) | Increases attack and magic power of all allies for 4 turns |
| Battle Techniques (Moonlight Curtain I-III) | Increases defense and skill of all allies for 4 turns |
Shop Data
Grantaire Item Shop (Ability)
| item | price | effect |
| Beginner | 200 | When HP is over 50%, the maximum MC increases slightly. |
| Power I | 200 | Attack power increases slightly |
| Power II | 500 | Moderately increases attack power |
| Magic I | 200 | Magic power increases slightly |
| Magic II | 500 | Magical power increases moderately |
| Agility I | 200 | Slightly increases evasion ability |
| Agility II | 500 | Moderately increases evasion ability |
| Critical I | 200 | Slightly increases critical chance |
| Critical II | 500 | Moderately increases critical chance |
| Dex I | 200 | Skill increases slightly. |
| Dex II | 500 | Skills increase moderately |
Grand Tail Item Shop (Items)
| item | price | effect |
| Blacksmith’s Bag | 3000 | You can now inherit weapon skills anywhere |
| Apple Jelly | 50 | Recover a small amount of HP |
| Tangerine jelly | 170 | Moderately recovers HP |
| Carrot juice | 120 | Recovers a small amount of MC |
| tomato juice | 300 | Moderate recovery of MC |
| Freshly baked bread | 7 | Removes poison status |
| Energy Potion | 20 | Using Charge during battle can greatly recover MC. |
| Elixir | 350 | Revives a single stunned ally |
Grantaire Weapon Shop (Main)
| item | price | effect |
| Broadsword | 70 | Attack power +8, base attack power x1.1 |
| Long sword | 150 | Attack power +11, base attack power x1.1 |
| Corishmald | 370 | Attack power +15, Basic attack power x1.1 |
| Falchion | 540 | Attack power +32, basic attack power x1.1 |
| Sickle | 50 | Attack power +3, Magic power increase 1.1 times |
| Warsight | 200 | Attack power +5, Magic power increase 1.1 times |
| Krug | 240 | Attack power +11, Magic power increase 1.1 times |
| Ciuccoalto | 490 | Attack power +16, Magic power increase 1.1 times |
| Crossbow | 100 | Attack power +4, double attack 0.6x |
| Repeater Bow | 240 | Attack power +6, double attack 0.6x |
| Gastraphetes | 320 | Attack power +10, double attack 0.6x |
| Windlass | 570 | Attack power +19, double attack 0.6x |
Grantaire Weapon Shop (Sub Weapon)
| item | price | effect |
| Knight’s Lance | 75 | Attack power +3, All-attack 0.8x |
| Owl Pike | 250 | Attack power +5, All-attack 0.8x |
| Winged Spear | 330 | Attack power +13, All-attack 0.8x |
| Flamea | 510 | Attack power +22, All-attack 0.8x |
| Force Rod | 100 | Attack power +1, automatic counterattack to normal attacks x1.0 |
| Asage | 300 | Attack power +3, automatic counterattack x1.0 for normal attacks |
| Holy Wand | 350 | Attack power +5, automatic counterattack x1.0 for normal attacks |
| Aether Scepter | 520 | Attack power +15, automatic counterattack to normal attacks x1.0 |
| Hand Axe | 120 | Attack power +9, All-attack 0.7x |
| Hatchet | 250 | Attack power +14, All-attack 0.7x |
| Francisca | 370 | Attack power +17, All-attack 0.7x |
| Tomahawk | 580 | Attack power +28, All-attack 0.7x |
Grand Tail Armor Shop (Armor A)
| item | price | effect |
| Leather Armor | 30 | Defense +4, Target Rate -8% |
| Chainmail | 100 | Defense +4, Target Rate -8% |
| Panoply | 210 | Defense +7, Target Rate -8% |
| Gothic Armor | 700 | Defense +12, Target Rate -8% |
| Cuirass | 1200 | Defense +16, Target Rate -8% |
Grantaire Armor Shop (Armor B)
| item | price | effect |
| Cloth clothing | twenty five | Physical defense +1, speed +1, target chance -13% |
| Pilgrim’s clothing | 170 | Defense +2, Speed +3, Target Rate -12% |
| Sacred Vestments | 680 | Defense +6, Speed +5, Target Rate -12% |
| Mentor’s Clothing | 1000 | Defense +9, Speed +8, Target Rate -12% |
| Cache-coeur | 3300 | Defense +19, Speed +10, Target Rate -12% |
Grantaire Armor Shop (Shield)
| item | price | effect |
| Buckler | 100 | Defense +3 |
| Scale Shield | 150 | Defense power +4, Recovery power +2 |
| Kite Shield | 200 | Defense power +6, Recovery power +4 |
| Heater Shield | 550 | Defense power +10, Recovery power +7 |
| Magic Shield | 700 | Defense power +14, Recovery power +13 |
Grantaire Armor Shop (Gloves)
| item | price | effect |
| Leather gloves | 120 | Maximum MC+2 |
| Thick gloves | 170 | Max MC+2, Dexterity+1 |
| Iron Gauntlets | 220 | Maximum MC+3, Dexterity+2 |
| Gauntlet | 480 | Max MC+5, Defense+5, Speed+2, Skill+5 |
| Mentor’s Gloves | 750 | Maximum MC+8, Defense+5, Speed+2, Skill+10 |
Estalia Weapon Shop
| item | price | effect |
| Flamberge | 1750 | Attack power +40, Basic attack power x1.1 |
| Corsesca | 1800 | Attack power +31, All-attack 0.8x |
| Morning star | 1950 | Attack power +23, Magic power increase 1.1 times |
| Azot Knife | 1870 | Attack power +22, automatic counterattack x1.0 for normal attacks |
| Crane Quinn | 1800 | Attack power +24, Double attack 0.6x |
| Pikopiko Hammer | 1730 | Attack power +33, All-attack 0.7x |
Estalia Armor Shop
| item | price | effect |
| Bikini Armor | 2450 | Defense +16, Target Rate -8% |
| Pavis | 1200 | Defense +12 |
| Saint’s Cloth | 1500 | Max MC+9, Defense+7, Speed+1, Skill+9 |
Wildflower City Weapon Shop
| item | price | effect |
| Quintillion | 4100 | Attack power +51, base attack power x1.1 |
| Cruse Fiction | 3950 | Attack power +40, All-attack 0.8x |
| Adamas | 4200 | Attack power +32, Magic power increase 1.1 times |
| Angel Halo | 4000 | Attack power +29, automatic counterattack to normal attacks x1.0 |
| Arbalest | 4150 | Attack power +32, double attack 0.6x |
| Halberd | 4350 | Attack power +41, All-attack 0.7x |
Wildflower City Armor Shop
| item | price | effect |
| Cast Iron Blast | 3550 | Defense +21, Target Rate -8% |
| Fluffy coat | 4200 | Defense +16, Speed +7, Target Rate -12% |
| Duralumin Shield | 3000 | Defense +15 |
| Fluffy gloves | 3200 | Max MC+9, Defense+12, Speed+4, Skill+9 |
Virtual Weapon Shop
| item | price | effect |
| Orbit Sword | 7400 | Attack power +59, Basic attack power x1.1 |
| Orbit Zapper | 7740 | Attack power +47, All-attack 0.8x |
| Orbit Whip | 6550 | Attack power +39, Magic power increase 1.1 times |
| Orbit Rod | 7650 | Attack power +35, automatic counterattack x1.0 for normal attacks |
| Orbit Bow | 6800 | Attack power +40, Double attack 0.6x |
| Orbit Hammer | 7000 | Attack power +50, All-attack 0.7x |
| Maximilian | 4800 | Defense +42, Target Rate -8% |
| Filia Robe | 5100 | Defense +30, Speed +15, Target Rate -12% |
| Hildur’s Sail | 10000 | Defense +28 |
| Filia Grove | 7000 | Maximum MC+20, Defense+19, Speed+8, Skill+15 |
Virtual Space Ability Shop
| item | price | effect |
| Power III | 2000 | Attack power increases greatly |
| Magic III | 2000 | Magical power increases greatly |
| Agility III | 2000 | Greatly increases evasion ability |
| Critical III | 2000 | Critical hit rate increases dramatically |
| Dex III | 2000 | Skills will increase greatly |
Virtual Space Restaurant
| item | price | effect |
| Fruit Anmitsu | 70 | Recovers MC8 for everyone after battle for a while |
| Jumbo Parfait | 100 | After combat ends, everyone recovers 10 MC for a short time. |
| Party Pizza | 112 | After the battle ends, everyone’s HP and MC are greatly restored for a while. |
Grand Tail Tailor
| item | price |
| Casual clothes/Aster | 300 |
| Casual clothes/Ima | 300 |
| Casual Clothes/Disaster | 300 |
| Magic Academy Uniform/Aster | 1500 |
| Magic Academy Uniform/Now | 1500 |
| Magic Academy Uniform/Disaster | 1500 |
| Waitress/Aster | 2800 |
| Waitress/Ima | 2800 |
| Battle Dress/Aster | 5000 |
| Battle Dress/Ima | 5000 |
| Battle Dress/Disaster | 5000 |
Grand Tail Golden Kitchen
| item | price | effect |
| Chocolate cornet | Ten | Recovers 2 MC for everyone after combat ends for a short time. |
| Pancake | 20 | Recovers everyone’s MC4 after battle for a while |
| Shortcake | 35 | Recovers 6 MC for everyone after battle for a short time |
| hot dog | 20 | After the battle ends, everyone’s HP and MC will recover slightly for a while. |
| hamburger | 34 | After the battle ends, everyone’s HP and MC are slightly restored for a while. |
| Omelette rice | 55 | After the battle ends, everyone’s HP and MC will be restored for a while. |
Govan Under Resort Casino Prize Exchange
| item | coin | effect |
| Idol Clothes/Aster (added in ver1.04) | 1000 | Changeable costumes |
| Idol Clothes/Ima (added in ver1.04) | 1000 | Changeable costumes |
| Idol Clothes/Disaster (added in ver1.04) | 1000 | Changeable costumes |
| Love Solas | 50 | H EXP +100 |
| Blacksmith’s bag | 500 | You will be able to inherit weapon skills anywhere. |
| Synthesis Recipe III | 2500 | More synthesis recipes |
| Engine Blade | 1000 | Attack power +36, Basic attack power x1.1, MC recovery reduced |
| Engine Spear | 1000 | Attack power +24, All-attack 0.8x, MC recovery reduced |
| Engine size | 1000 | Attack power +18, Magic power increase by 1.1 times, MC recovery decrease |
| Engine rod | 1000 | Attack power +17, automatic counterattack to normal attacks x1.0, MC recovery reduced |
| Engine gun | 1000 | Attack power +18, Double attack 0.6x, MC recovery reduced |
| Engine Hammer | 1000 | Attack power +27, All-attack 0.7x, MC recovery reduced |
| Ring of Destruction | 300 | Magic +6, Immune to status abnormalities of confusion and defense reduction |
| Official Hero Certification Exam Guide Ⅰ | 200 | Combat history points +200 |
| Magic Academy Teacher Recruitment Exam Preparation I | 200 | Combat history points +200 |
| Shindo Engineering Basic Theory Application Ⅰ | 200 | Combat history points +200 |
Wildflower City Casino Prize Exchange
| item | coin | effect |
| Super Love Solas | 230 | H EXP +500 |
| Synthesis Recipe V | 5000 | More synthesis recipes |
| Brave Blade | 3000 | Attack power +64, Basic attack power x1.1, MC recovery reduced |
| Demon’s Lance | 3000 | Attack power +52, All-attack 0.8x, MC recovery reduced |
| soul Eater | 3000 | Attack power +46, Magic power increase by 1.1 times, MC recovery decrease |
| Jupiter’s Staff | 3000 | Attack power +42, automatic counterattack to normal attacks x1.0, MC recovery reduced |
| Air Shooter | 3000 | Attack power +44, Double attack 0.6x, MC recovery reduced |
| Gorgon Anchor | 3000 | Attack power +56, All-attack 0.7x, MC recovery reduced |
| Official Hero Certification Exam Guide II | 1000 | Combat history points +500 |
| Magic Academy Teacher Recruitment Exam Preparation II | 1000 | Combat history points +500 |
| Shin-Tei Engineering Basic Theory Application II | 1000 | Combat history points +500 |
Legendary monster slaying reward
| item | Required number of kills | effect |
| Demon’s Ring | 1 figure | Attack↑, Defense↓ |
| Pastry Chef Ribbon | 2 figures | Skill +15, Cooking effect increase |
| Aurora Ring | 3 figures | Recovery power +50, HP regeneration rate +5% |
| Hero Muffler | 4 figures | |
| Official Hero Certification Exam Guide III | 5 figures | Combat history points +1000 |
| Magic Academy Teacher Recruitment Exam Preparation III | 6 figures | Combat history points +1000 |
| Shin Tei Engineering Basic Theory and Applications III | 7 bodies | Combat history points +1000 |
| The Great Phantom Thief’s Key | 8 figures | You can now enter houses that are behind bars or locked in various locations. |
| Synthesis Recipe VI | 9 figures | More synthesis recipes |
| Blagden Mine Map | 10 figures | Use it in your inventory to go from Log Space to Blagden Mines |
| Magic Stone Box Gold | 11 figures | Use it in the item list to obtain the magic crystals needed for rank VII synthesis. |
Extra Shop (Doping)
| item | price | effect |
| Heart fruit | 200 | Permanently HP +5 |
| Mysterious Grass | 200 | Permanently MC+2 |
| Crunchy Nuts | 200 | Permanently increase attack power by 2 |
| Prickly Flower | 200 | Permanently +2 Magic |
| Stubborn grass | 200 | Permanently +2 physical defense |
| Kikana grass | 200 | Permanently +2 Magic Defense |
| Shubaba leaves | 200 | Permanently +2 Speed |
| Walking grass | 200 | Permanently +2 Skill |
Extra Shop (Recollection/Save)
| item | price | effect |
| Reminiscence mode fully unlocked | 1000 | Unlock all memories |
| Anywhere Save Pen | 500 | You will be able to save anywhere |
Where to get the synthesis recipe
| recipe | Where to get it |
| Rank I | Magic Academy Chicken Professor |
| Rank II | Rescue Katche in the dungeon |
| Rank III | Casino prize exchange |
| Rank IV | Estaria City Hotel Treasure Chest |
| Rank V | Wildflower City Casino Prize Exchange |
| Rank VI | Legendary monster slaying reward |
| Rank VII | Treasure chest in the extra shop after defeating the Universal Behemoth |
Synthetic Weapons
Rank I
| weapon | cost | Material 1 | Material 2 | effect |
| Long Sword Improved | 100 | Magic Stone × 2 | Strong Branch x 2 | Attack power +11, base attack power x1.2 |
| Owl Pike Custom | 100 | Magic Stone × 2 | Strong Branch x 2 | Attack power +8, All-attack 0.9x |
| Warscythe Custom | 100 | Magic Stone × 2 | Strong Branch x 2 | Attack power +5, Magic power increase 1.15 times |
| Asage Kai | 100 | Magic Stone × 2 | Strong Branch x 2 | Attack power +3, automatic counterattack to normal attacks x1.1 |
| Repeater Bow Modified | 100 | Magic Stone × 2 | Strong Branch x 2 | Attack power +6, double attack 0.65x |
| Hatchet Custom | 100 | Magic Stone × 2 | Strong Branch x 2 | Attack power +14, All-attack 0.8x |
Rank II
| weapon | cost | Material 1 | Material 2 | effect |
| Corishmald Custom | 300 | Magic Stone × 3 | Hard Wood x 4 | Attack power +15, Basic attack power x1.2 |
| Winged Spear Kai | 300 | Magic Stone × 3 | Hard Wood x 4 | Attack power +13, All-attack 0.9x |
| Krugge Custom | 300 | Magic Stone × 3 | Hard Wood x 4 | Attack power +11, Magic power increase 1.15 times |
| Holy Wand Kai | 300 | Magic Stone × 3 | Hard Wood x 4 | Attack power +5, automatic counterattack to normal attacks x1.1 |
| Gastraphetes Custom | 300 | Magic Stone × 3 | Hard Wood x 4 | Attack power +10, double attack 0.65x |
| Francisca Kai | 300 | Magic Stone × 3 | Hard Wood x 4 | Attack power +17, All-attack 0.8x |
Rank III
| weapon | cost | Material 1 | Material 2 | effect |
| Falchion Custom | 500 | Magic Stone × 4 | Rare Clay x5 | Attack power +32, basic attack power x1.2 |
| Flamea Kai | 500 | Magic Stone × 4 | Rare Clay x5 | Attack power +22, All-attack 0.9x |
| Siuco Alto Kai | 500 | Magic Stone × 4 | Rare Clay x5 | Attack power +16, Magic power increase 1.15 times |
| Ether Scepter Improved | 500 | Magic Stone × 4 | Rare Clay x5 | Attack power +15, automatic counterattack to normal attacks x1.1 |
| Windlass Kai | 500 | Magic Stone × 4 | Rare Clay x5 | Attack power +19, double attack 0.65x |
| Tomahawk Kai | 500 | Magic Stone × 4 | Rare Clay x5 | Attack power +28, All-attack 0.8x |
Rank IV
| weapon | cost | Material 1 | Material 2 | effect |
| Flamberge Kai | 1000 | Magic Stone x 8 | Mysterious Ore x5 | Attack power +40, Basic attack power x1.2 |
| Corseska Custom | 1000 | Magic Stone x 8 | Mysterious Ore x5 | Attack power +31, All-attack 0.9x |
| Morning Star Kai | 1000 | Magic Stone x 8 | Mysterious Ore x5 | Attack power +23, Magic power increase 1.15 times |
| Azoth Knife Modification | 1000 | Magic Stone x 8 | Mysterious Ore x5 | Attack power +22, automatic counterattack to normal attacks x1.1 |
| Crane Quinn Kai | 1000 | Magic Stone x 8 | Mysterious Ore x5 | Attack power +24, double attack 0.65x |
| Pico Pico Hammer Improved | 1000 | Magic Stone x 8 | Mysterious Ore x5 | Attack power +33, All-attack 0.8x |
Rank V
| weapon | cost | Material 1 | Material 2 | effect |
| Quintillion Kai | 2500 | Magic Stone x 12 | Crystal Fragment x 7 | Attack power +51, base attack power x1.2 |
| Cruse Fiction Kai | 2500 | Magic Stone x 12 | Crystal Fragment x 7 | Attack power +40, All-attack 0.9x |
| Adamas Custom | 2500 | Magic Stone x 12 | Crystal Fragment x 7 | Attack power +32, Magic power increase 1.15 times |
| Angel Halo Kai | 2500 | Magic Stone x 12 | Crystal Fragment x 7 | Attack power +29, automatic counterattack to normal attacks x1.1 |
| Arbalest Custom | 2500 | Magic Stone x 12 | Crystal Fragment x 7 | Attack power +32, double attack 0.65x |
| Halberd Custom | 2500 | Magic Stone x 12 | Crystal Fragment x 7 | Attack power +41, All-attack 0.8x |
Rank VI
| weapon | cost | Material 1 | Material 2 | effect |
| Sword of Salvation – Claw Solace | 5000 | Magic Stone x 45 | Mythril x10 | Attack power +90, Basic attack power x1.3 |
| Dragon Slayer Ascalon | 5000 | Magic Stone x 45 | Mythril x10 | Attack power +71, full attack power x1 |
| Fire Whip Prometheus | 5000 | Magic Stone x 45 | Mythril x10 | Attack power +60, Magic power increase 1.2 times |
| Sacred Tree Laevateinn | 5000 | Magic Stone x 45 | Mythril x10 | Attack power +50, automatic counterattack to normal attacks x1.15 |
| Fragarach the Vengeful Sword | 5000 | Magic Stone x 45 | Mythril x10 | Attack power +61, Double Attack 0.75x |
| Demonic Axe Labrys | 5000 | Magic Stone x 45 | Mythril x10 | Attack power +75, All-attack 0.9x |
Rank VII
Magic Crystals can be obtained by using the Gold Magic Stone Box obtained by defeating 10 Legendary monsters.
| weapon | cost | Material 1 | Material 2 | effect |
| Creation Sword Alstroemeria | 10000 | Magic Stone x 80 | Magic Crystal Blue Diamond | Attack power +104, basic attack power x1.4 |
| Shining Spear Stellaria | 10000 | Magic Stone x 80 | Magic Crystal Kyanite | Attack power +86, all-out attack x1.1 |
| Fate Scythe Cynic | 10000 | Magic Stone x 80 | Magic Crystal Rhodochrosite | Attack power +72, Magic power increase 1.25 times |
| Spirit Staff Euphorbia | 10000 | Magic Stone x 80 | Magic Crystal Alexandrite | Attack power +65, automatic counterattack to normal attacks x1.2 |
| Spiral Bow Spiraea | 10000 | Magic Stone x 80 | Magic Crystal Fluorite | Attack power +73, Double Attack 0.85x |
| Gladiolus Rondo Axe | 10000 | Magic Stone x 80 | Magic Crystal Zoisite | Attack power +89, same multiplier for all attacks |


dyyev2