
This article is a strategy article for “A Brilliant Exorcist Never Yields to Tentacle Monsters!” by the circle “K.Y.K.Y”. You can download the game from Here. In addition to the strategy chart, H scene list, and conditions, we also include various data such as the types of H attacks used by monsters, so please be careful of spoilers.
Story introduction
Hiyori Aikawa, an exorcist, is captured by a demon in an abandoned building late at night. Her clothes were also torn and she was left in the same state as she was born, with an expression of ecstasy as the strange monster continued to rape her from behind. As the spiritual power that was the source of the exorcist’s power continued to be sucked from her nipples and vagina, she had no strength left to fight, and it seemed like this lewd party would continue forever.
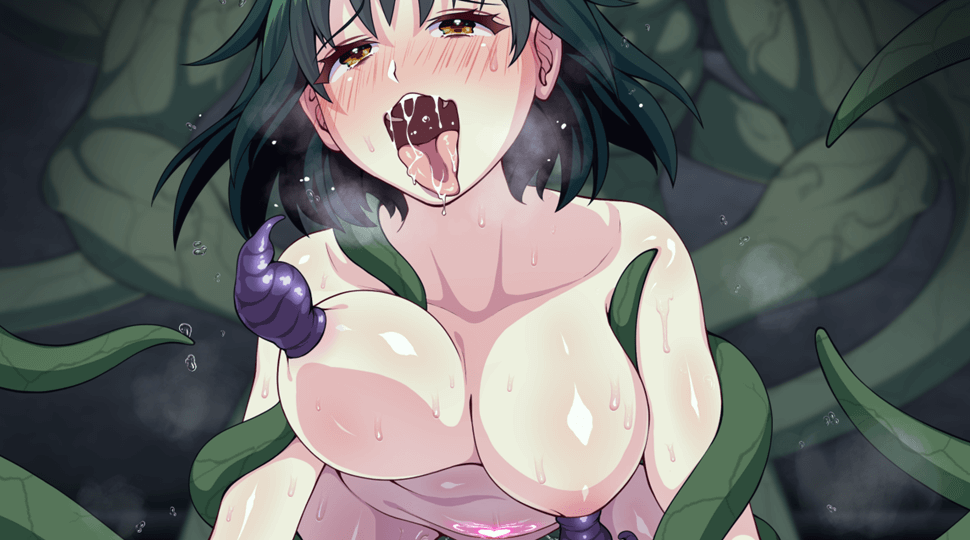
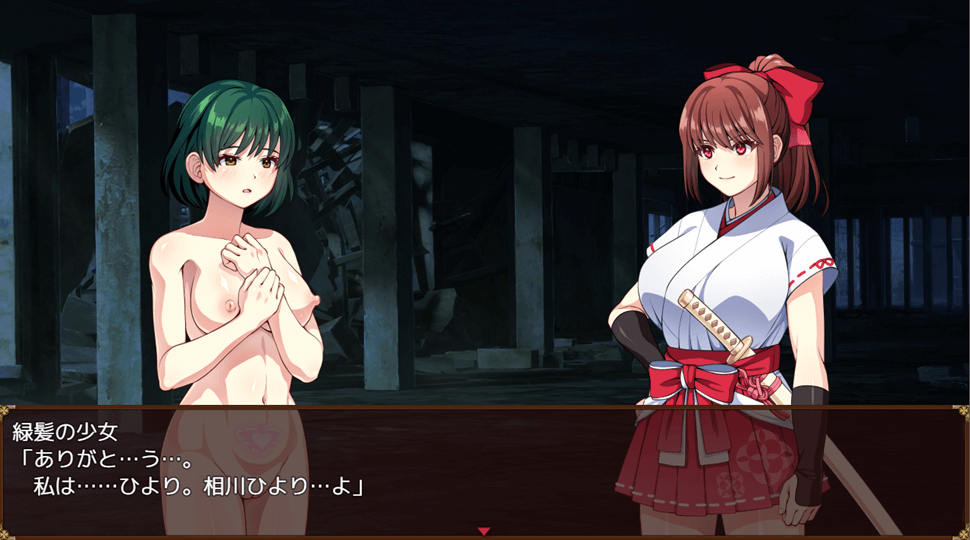
At that time, the main character, Mari Kurana, came to the rescue. The demon quickly ran away, and Mari managed to rescue Hiyori, who was on the verge of death due to being drained of too much spiritual power, by using a spirit tag to treat her.
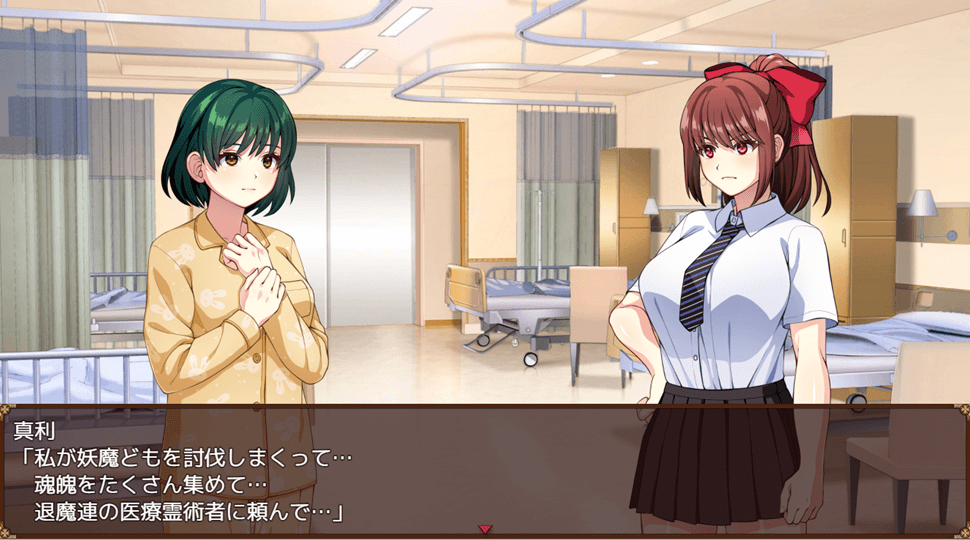
About half a year has passed since then, and the two have become friends after that incident , and Mari often visits Hiyori’s hospital room to visit her. Hiyori was cursed with a lewd crest due to that day’s rape, which made her unable to fight as an exorcist ever again.

One day, while gathering information about demons, Mari learns from Yoko, the bartender she visits, that the head of the Kiryu family, known for their strong abilities as exorcists, has gone missing. Yoko informs her that there are rumors circulating in the city about powerful demons lurking around.
Upon hearing this, Mari considers that if she can defeat powerful demons, she might obtain soul essence that could be used to heal Hiyori through the medical spiritual techniques of the Exorcism Association. With this in mind, she decides to immerse herself in battles against demons in the city at night…
Impressions/Reviews
① Explore the city at night and find out information about demons
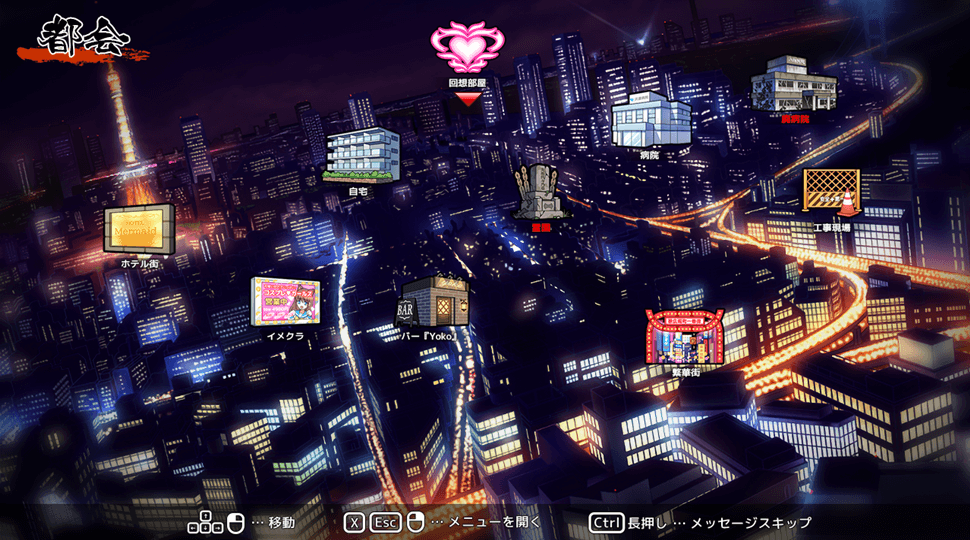
The demons begin their activities at night, so the main character, Mari, has to interview the places where the demons appear at night. She can go to different parts of the city using the field map, and by listening to information about places where demons are infested, she can go to new areas.
In the night town, Yoko, the bar master, and Miki, a classmate, introduce her to naughty jobs. It is possible to have an H event by accepting an introduced job or heading to a hotel area or image club at night. The sex scenes here are mostly prostitution-related situations such as working at an adult entertainment shop or subsidized dating.
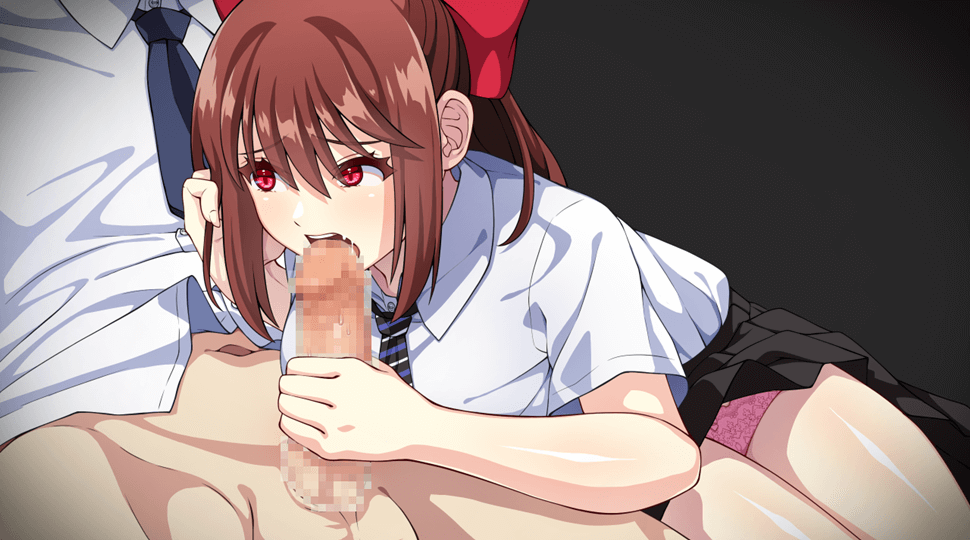
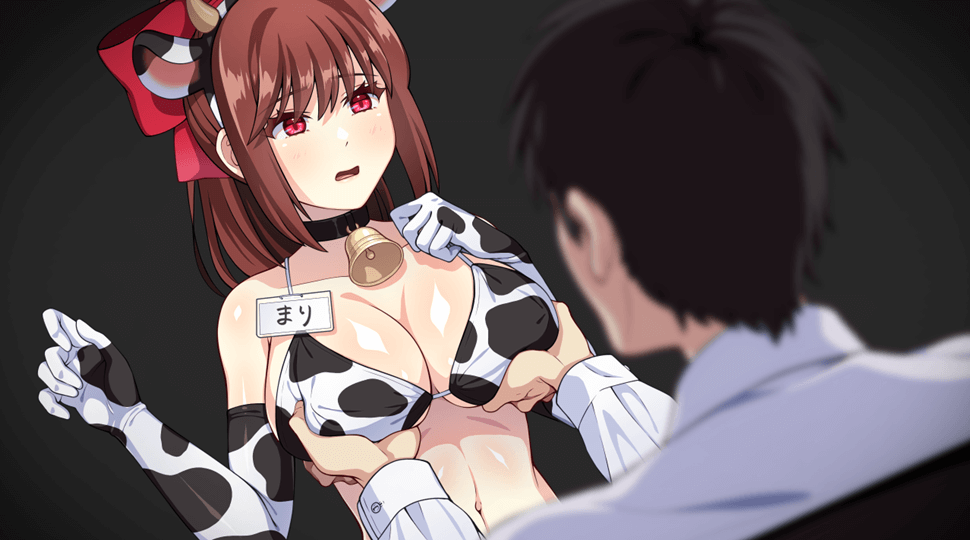
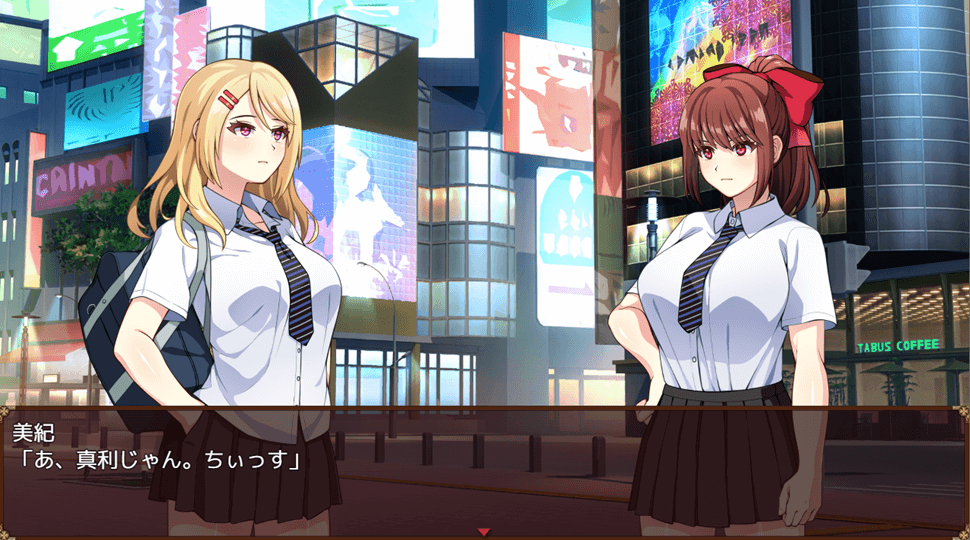
Miki, who goes to the same school as Mari and looks like a gal, introduces you to jobs in the hotel district and image club. In the hotel area, she is invited to prostitution by an office worker and ends up giving a blow job at a love hotel, and at an image club, she cosplays as a sexy cat and serves customers with titty fucks .
Yoko is a demon who does not harm people, and by absorbing spiritual power, you can obtain money called konpaku , which can be used for shopping. There will also be events where regular customers, who help out at her shop, are forced to wear sexy cow-print bikinis and have as much access to her breasts as they like for a limited time.
②H attack from the demon
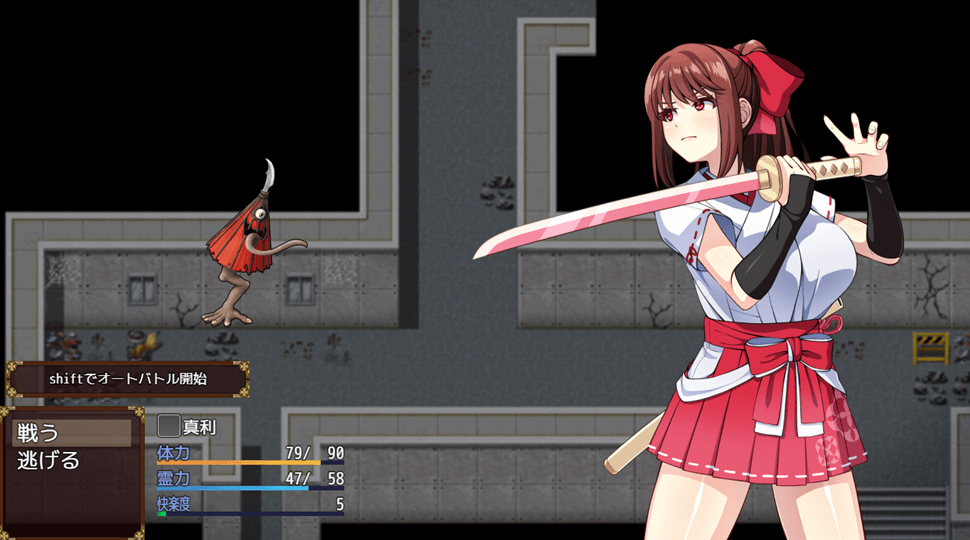

The place where demons appear is built like a dungeon, and while defeating the small demons wandering around, you will head towards the powerful boss demon in the back, and you will come into contact with the enemies wandering around. By doing so, you will enter into battle. The battles in this game are command battles , and while exploring the city, Mari wears a uniform, but inside the dungeon she transforms into a spiritual gear shaped like a shrine maiden outfit .
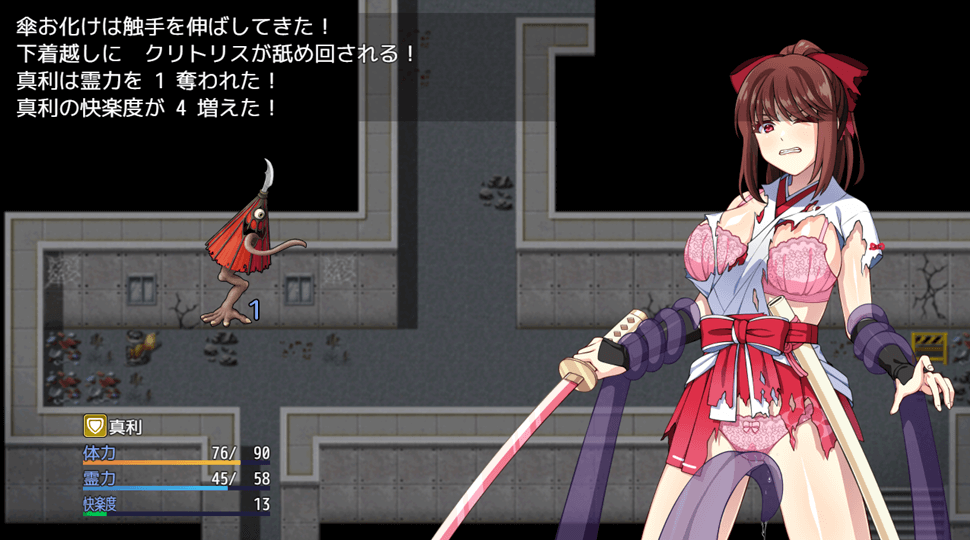
There is also an armor break element in which when she receives damage from an enemy, her shrine maiden costume is torn, and in this state, the enemy will launch an H attack in an attempt to absorb her spiritual power. When you receive an H attack, your pleasure level will increase, and when this value reaches 100, you will climax and be unable to act for one turn.

At the peak, there is not only a disadvantage, but also the effect that spiritual power, which is an MP status, is fully recovered and the attack power increases, so depending on the situation, it may be more effective to purposely climax with the enemy’s H attack. There are two types of H attacks for each enemy, making a total of 24 types and a wide variety.
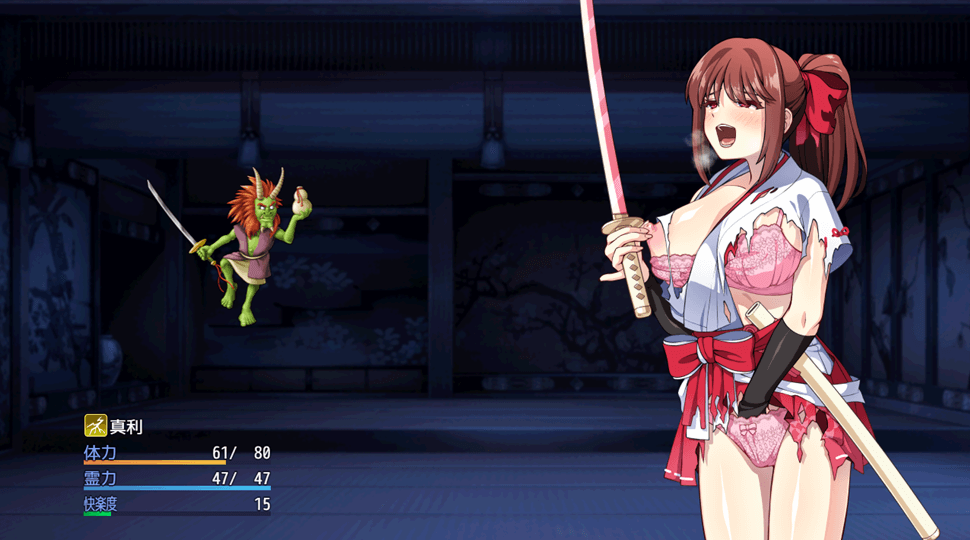

In addition, some of the enemy’s H attacks include special status abnormal effects such as breast milk constitution and demon parasitism , and when affected by this status abnormality, the main character’s standing picture displayed on the right during battle will change. It changes. If you have a breast-feeding constitution, your breasts will always be gushing out milk, and if you are parasitized by a young demon, you will have to fight while enduring the demons that move around as they please within your vagina.
③She was defeated and raped by the demon…
If you are defeated in battle by a demon, you can watch the defeat H scene. Many of the H events in this work are staged, and by viewing H events in the city and defeat H scenes, the status of lewdness will rise, and as this rises, Mari’s reaction during H will also increase. As she changes, she begins to accept extreme play, and the next level of H scenes are released.
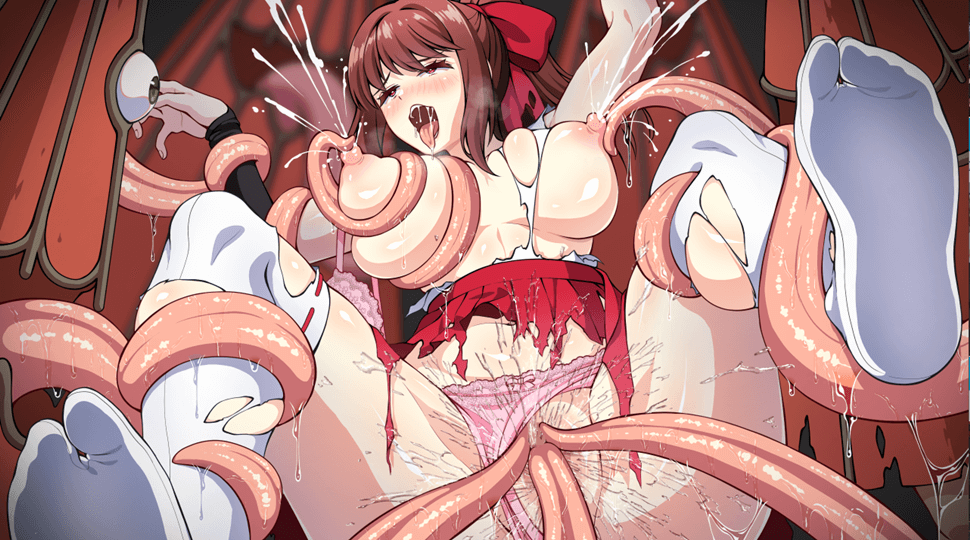
If you are defeated by the Umbrella Ghost, your body will be restrained with a long tongue and your clitoris and nipples will be licked. Some of the H scenes will change if you have a breast milk constitution or are parasitic with a monster, and in the case of Umbrella Ghost, the scene will change to a scene where you squirt breast milk at the same time as you climax.
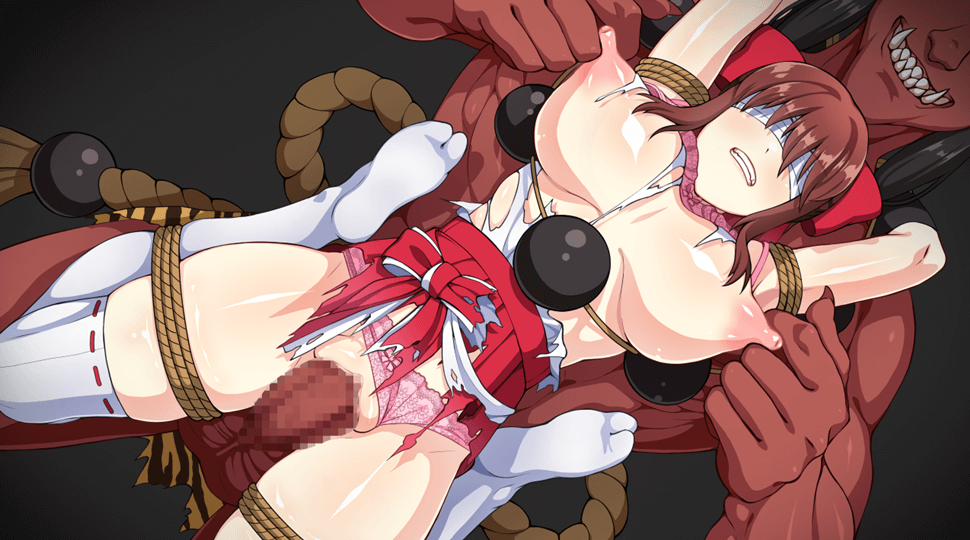

If she is defeated by the red demon, her body will be restrained with ropes and her vagina will be raped by a penis that is thicker than a human’s. Her erogenous zones are stimulated by piston movements while her nipples are relentlessly attacked, and she continues to be raped until her spiritual power is exhausted.
④ Impressions/Reviews
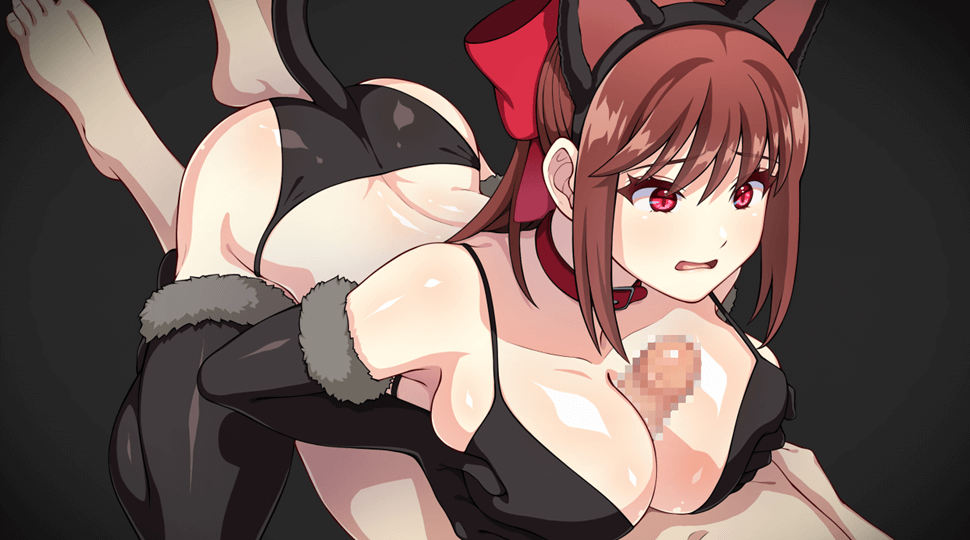
Circle “K.Y.K.Y ” is a circle that mainly produces manga, CG, and illustration collections, and this seems to be the first time they have released a game work. The main character of this work is a big-breasted high school girl who is an exorcist and has a somewhat bullish personality.
The H-scenes include both interpersonal sex, such as prostitution in the city, and interspecies sex with monsters called monsters, and there are basically three stages depending on the level of lewdness, so you gradually descend into pleasure. The feeling is carefully depicted. The scene changes depending on whether you are breastfeeding or being parasitized by a demon, so you can enjoy the same scene over and over again.
The game part is similar to a normal RPG, and the system is simple. In this game’s battles, it’s refreshing to see that there are not only disadvantages but also positive effects when you reach climax, and it was good that you can actively enjoy the battle H without it becoming a chore. The play time until the ending after collecting all the H scenes was ” about 5 hours “. I think this is a perfect work for those who like elements such as shrine maidens and high school girls.
Q&A FAQ
Q. Is the H scene fully open?
It is possible to fully unlock them by examining objects in the recollection room from the beginning of the game .
Q. Cannot defeat the enemy
Barrier Formation/Spiritual Sword skills are powerful skills whose effects last until the end of the battle once activated.
In addition to this, if you activate a healing light formation that lasts for a long time, you can basically deal with all enemies.
Q.Where to get the vibrator, brush rotor, and Tsukumogami’s indecent tag
You can get the vibrator from Miki at the event when you enter the downtown area. (Does it happen randomly?)
You can get the brush rotor at an event where you lend money to Miki in the downtown area.
Tsukumogami’s indecent tag can be obtained in the last dungeon.
All three can also be obtained with Konpaku Omikuji.
Walkthrough
Some randomly occurring events are not listed.
*Early information gathering*
Talk to Yoko at the bar and you will be able to go to the ” Abandoned Hospital”. The red demon that fights at a construction site can also fight in an abandoned hospital, so there’s no problem even if you miss out on the sex scenes.
Event that occurs
| place | action | reward |
| hospital | Visit Hiyori | magatama of inspiration |
| downtown area | enter the area | So that I can go to the hotel town |
| one’s home | look at smartphone | be able to go to the construction site |
| one’s home | Look at your smartphone (second time) | So that I can go to an image club |
| bar yoko | to shop | spirit ball |
| bar yoko | talk to yoko | So that I can go to an abandoned hospital |
| bar yoko | provide spiritual power | Obtain soul after H scene “Spiritual Power Provision 1 (Nympho Lv1)” |
| hotel town | go to hotel | Obtain Yukichi’s paper x2 after H scene “Hotel 1 (Nympho Lv1)” |
| Image club | go to work | Obtain Yukichi’s paper after H scene “Image Club 1 (Nympho Lv1)” |
| Construction site | enter the area | Obtain strengthening spirit tags by winning the battle with the red demon. |
Abandoned hospital
You can now go to the ” Cemetery ” by talking to the ghost in the back room of the 2nd floor. The “strengthening spirit tags” you can get along the way can strengthen your equipment, so be sure to use them as soon as you get them. It is recommended to level up your weapons to quickly end the battle with small fry.
- Konpakumaru
- 128 Soul
- 208 Soul
- spirit ball
- 29 soul
- Healing talisman
- 100 souls
- Strengthening Spirit Talisman
- quickness pill
- naughty book
- jet black feather
Newly appearing monsters
| monster | Experience point | money | H attack to use |
| Kainade | 6EXP | 12G | Ass licking/bra tentacles |
| umbrella ghost | 10EXP | 16G | Tentacle Kiss/Pants Licking Tentacle |
| One bottle | 12EXP | 21G | After kissing and breast fondling |
| red demon | 18EXP | 35G | Cunnilingus/nipple grabbing |
Cemetery
If you talk to the ghost in the south area, you will receive 100 souls.
When you reach the back, you will enter a boss battle.
- 450 soul
- Konpakumaru
- spirit ball
- secret scroll
- dazzling smoke ball
- moon fragment
- protective pills
- Magatama of protection
- naughty book
- Healing talisman
- Strengthening Spirit Talisman
- jet black feather
Newly appearing monsters
| monster | Experience point | money | H attack to use |
| oil baby | 31EXP | 32G | Breast sucking/drinking oil |
| half-demon human | 29EXP | 38G | Before breast rubbing/fingering |
| Tsutsuga Mushi | 38EXP | 61G | Birth/juvenile |
| Genranki (Boss) | 400EXP | 0G | Butt massage/Before breast massage/Hypnosis |
Hospital
As you head to the hospital, an event will occur where you can sense a ghost.
After that, select “Head to the hospital room” and you will enter a boss battle with the Genran Demon Hiyori.
Hiyori does not use H attacks, and Genranki’s H attacks are the same as last time.
Defeating the Genran Demon will be considered a victory in battle.
After winning, you can learn the skill ” Shamanjutsu: Crimson Flame “.
*Information gathering*
Event that occurs
| place | action | reward |
| Construction site | enter the area | Obtain 500 souls |
| downtown area | enter the area | Give Yukichi’s paper to Miki and get the “Brush Rotor” |
| bar yoko | talk to yoko | Unlocking the “Help in the store” command |
| bar yoko | Talk to Yoko (second time) | Information about powerful exorcists |
| bar yoko | help the store | Obtain 100 souls after H scene “Helping Yoko 1” |
| one’s home | look at smartphone | Events will now occur in the hotel area. |
| hotel town | enter the area | so you can go to the abandoned building |
Abandoned building
You can enter the inaccessible areas along the way by falling through the hole on the 4th floor.
When you reach the end, you will enter a boss battle with Ushioni, and if you win, you will have a series of battles with Ichika.
- moon fragment
- spirit ball
- Yukichi’s paper
- Purifying medicine
- Healing talisman
- power pills
- 680G
- Strengthening Spirit Talisman
- Aphrodisiac of estrus
- jet black feather
- life pill
Newly appearing monsters
| monster | Experience point | money | H attack to use |
| pillow return | 54EXP | 59G | Breast sucking/cunnilingus |
| Painted wall | 71EXP | 85G | After breast rubbing/fingering |
| Ushioni (Boss) | 800EXP | 1000G | After breast sucking and breast fondling |
| Ichika (Boss) | 1000EXP | 0G | none |
Boss Ushi-oni
After gathering power, he will unleash a powerful attack, so you should defend yourself against him.
You can fight him more stably by putting him in a confused state with “Secret Sword – Gekka”.
Boss Ichika:
The next turn after sheathing her sword, she will release “Secret Sword: Castle Break”.
Be careful as the barrier formation will be removed if you receive this attack.
Since she doesn’t use H attacks, you won’t be able to recover spiritual power through climax, so you’ll want to prepare some recovery items.
*Information gathering*
By using the station, you can go to the ” hot spring town “.
Event that occurs
| place | action | reward |
| hospital | give sympathy | Shamanship: Spiritual Sword |
| hospital | Visiting someone (second time) | Event related to why Hiyori became an exorcist |
| bar yoko | Talk to Yoko and give her soul or offer spiritual power. | so that I can go to the station |
| one’s home | sleep in bed | Dream event about Mari’s mother |
| station | hold on until you reach the station | H scene “Molester” |
| Inn | go to a hot spring | H scene “hot spring” |
| riverbed | enter the area | Obtain strengthening spirit tags by winning battles with kappa. |
| tourist street | buy bills | Obtain strengthening spirit talisman |
| shrine | enter the area | So that I can go on the mountain trail |
Trail
When you reach the back, you will enter a boss battle, and if you win, you will be able to go to the ” Limestone Cave “.
- spirit ball
- Purifying medicine
- dazzling smoke ball
- 510G
- witchcraft pill
- spirit ball
- Healing talisman
- Strengthening Spirit Talisman
- elixir of depression
- Konpakumaru
- 1230G
- ring of greed
monster
| monster | Experience point | money | drop items |
| potter’s neck | 92EXP | 76G | cunnilingus kiss |
| tree child | 97EXP | 55G | Tentacles inside pants/breast sucking tentacles |
| Nozuchi | 136EXP | 110G | Tentacle Kiss/Pants Licking Tentacle |
| Karasu Tengu (Boss) | 1200EXP | 1000G | After grabbing nipples and massaging breasts |
Boss Karasu Tengu’s
“Tengu’s Wind” increases the enemy’s agility.
*Information gathering*
Event that occurs
| place | action | reward |
| downtown area | enter the area | Event at cafe with Miki |
| downtown area | Enter the area (second time) | You can receive a vibrator from Miki. |
| shrine | enter the area | secret scroll |
| riverbed | enter the area | Obtain 500 souls |
Limestone cave
When you reach the end, you’ll fight Ichika (for the second time), and if you win, you’ll fight the final boss.
If you select “I swear” after losing this battle, the game will be over after the sex scene.
If you win, you will enter the ending.
After the ending, the game will start before the final boss.
- life pill
- elixir of depression
- 726G
- Konpakumaru
- Tsukumogami’s indecent card
- spirit ball
- spiritual power pills
- Healing talisman
- secret scroll
- Strengthening Spirit Talisman
- spirit ball
monster
| monster | Experience point | money | drop items |
| evil spirits | 148EXP | 102G | Before kissing and breast fondling |
| Kappa | 113EXP | 87G | Ass rubbing/Ass licking |
| Takonyūdō | 125EXP | 90G | Juvenile/Tentacles inside the bra |
| Sazae demon | 180EXP | 150G | Magic liquid injection/tentacle in bra |
| starving skull | 240EXP | 150G | Nipples and Handjob |
| Ichika (second time) | 1600EXP | 0G | none |
| ? ? ? (last boss) | 0EXP | 0G | Juvenile, liquid injection, tentacle kiss, suction tentacle, tentacle in pants |
Boss Ichika (Second Time)
“Barrier Formation” will be canceled by the enemy’s attack, but Spiritual Sword and Healing Light Formation will not be canceled,
so it is recommended to activate these two and aim for a short decisive battle.
Boss ? ? ? (Last Boss)
If you have learned the Spiritual Sword in the event with Hiyori, it will be activated automatically at the start of the battle.
If you activate all of Barrier Formation, Spirit Stream Sword, and Healing Light Formation before fighting, you shouldn’t have such a hard time.
Try to defend against the enemy’s powerful blow after charging up.
H scene list/conditions
| H scene | Occurrence conditions |
| Genran Oni Lewd Lv1 | Defeated by Genran Demon at lewd level 1 |
| Genran Oni Nasty Lv2 | Defeated by Genran Demon at lewd level 2 |
| Genran Oni Nasty Lv3 | Defeated by Genran Demon at lewd level 3 |
| Genranki breast milk constitution | Defeated by Genranki while breastfeeding |
| Hiyori lewd Lv1 | Defeated by Hiyori at lewd level 1 |
| Hiyori lewd Lv2 | Defeated by Hiyori at Lewd Lv2 |
| Hiyori lewd Lv3 | Defeated by Hiyori at lewd level 3 |
| Hiyori breast milk constitution | Defeated by Hiyori due to breast milk constitution |
| Ushioni lewd Lv1 | Defeated by Ushioni at lewd level 1 |
| Ushioni lewd Lv2 | Defeated by Ushioni at Lewd Lv2 |
| Ushioni lewd Lv3 | Defeated by Ushioni at lewd level 3 |
| Ichika lewd Lv1 | Defeated by Ichika at lewd level 1 |
| Ichika lewd Lv2 | Defeated by Ichika at lewd level 2 |
| Ichika lewd Lv3 | Defeated by Ichika at lewd level 3 |
| Ichika breast milk constitution | Defeated by Ichika due to breast milk constitution |
| Karasu Tengu Lewd Lv1 | Defeated by Karasu Tengu at Lewd Lv1 |
| Karasu Tengu Lewd Lv2 | Defeated by Karasu Tengu at Lewd Lv2 |
| Karasu Tengu lewd Lv3 | Defeated by Karasu Tengu at Lewd Lv3 |
| Ichika (second time) Lewd Lv1 | Defeated by Ichika (second time) at lewd level 1 |
| Ichika (second time) Lewd Lv2 | Defeated by Ichika (second time) at lewd level 2 |
| Ichika (second time) Lewd Lv3 | Defeated by Ichika (second time) at lewd level 3 |
| Ichika (second time) Breast milk constitution | Defeated by Ichika (second time) due to breast milk constitution |
| Kudara 1 Lewd Lv1 | Defeated by Kudara at lewd level 1 |
| Kudara 1 Lewd Lv2 | Defeated by Kudara at lewd level 2 |
| Kudara 1 Lewd Lv3 | Defeated by Kudara at lewd level 3 |
| Kudara 1 Breast milk constitution | Defeated by Kudara due to breast milk constitution |
| Kudara 2 | Select “I swear” after being defeated by Kudara |
| Kudara 3 | Automatically occurs after Kudara 2 |
| Kudara 4 | Automatically occurs after Kudara 3 |
| Kainade Lewd Lv1 | Defeated by Kainade at Lewd Lv1 |
| Kainade lewd Lv2 | Defeated by Kainade at Lewd Lv2 |
| Kainade lewd Lv3 | Defeated by Kainade at Lewd Lv3 |
| Umbrella Ghost Lewd Lv1 | Defeated by Umbrella Ghost at Lewd Lv1 |
| Umbrella Ghost Lewd Lv2 | Defeated by Umbrella Ghost at Lewd Lv2 |
| Umbrella Ghost Lewd Lv3 | Defeated by Umbrella Ghost at Lewd Lv3 |
| Umbrella ghost breast milk constitution | Defeated by Umbrella Ghost due to breast milk constitution |
| Ippondatara Lewd Lv1 | Defeated by Ippon Dara at Lewd Lv1 |
| Ippondatara Lewd Lv2 | Defeated by Ippon Dara at Lewd Lv2 |
| Ippondatara Lewd Lv3 | Defeated by Ippon Dara at lewd level 3 |
| Red demon lewd Lv1 | Defeated by Red Demon at Lewd Lv1 |
| Akaoni lewd Lv2 | Defeated by Red Demon at Lewd Lv2 |
| Akaoni lewd Lv3 | Defeated by Red Demon at Lewd Lv3 |
| Akaoni breast milk constitution | Defeated by Red Demon due to breast milk constitution |
| Half-demon lewd Lv1 | Defeated by a half-demon human at lewd level 1 |
| Half-demon lewd Lv2 | Defeated by a half-demon human at lewd level 2 |
| Half-demon lewd Lv3 | Defeated by a half-demon human at lewd level 3 |
| Half-demon human demon parasitic | Defeated by half-demon humans due to demon parasitism |
| Oil baby lewd Lv1 | Defeated by Oil Baby at Lewd Lv1 |
| Oil baby lewd Lv2 | Defeated by Oil Baby at Lewd Lv2 |
| Oil baby lewd Lv3 | Defeated by Oil Baby at Lewd Lv3 |
| Pillow return lewd Lv1 | Defeated by makuragaeshi at lewd level 1 |
| Pillow Gaeshi Lewd Lv2 | Defeated by makuragaeshi at lewd level 2 |
| Pillow Gaeshi Lewd Lv3 | Defeated by makuragaeshi at lewd level 3 |
| Painted wall lewd Lv1 | Defeated by Nuribe at lewd level 1 |
| Painted wall lewd Lv2 | Defeated by Nuribe at lewd level 2 |
| Painted Wall Lewd Level 3 | Defeated by Nuribe at lewd level 3 |
| Painted wall demon parasitism | Defeated by Nuribe due to demon parasitism |
| Tsutsuga Mushi Nasty Lv1 | Defeated by Tsutsuga Mushi at lewd Lv1 |
| Tsutsuga Mushi Nasty Lv2 | Defeated by Tsutsuga Mushi at lewd Lv2 |
| Tsutsuga Mushi Nasty Lv3 | Defeated by Tsutsuga Mushi at Nasty Lv3 |
| Tsutsugamushi breast milk constitution | Defeated by Tsutsuga Mushi due to breast milk constitution |
| Rokurokubi Nasty Lv1 | Defeated by Rokurokubi at lewd level 1 |
| Rokurokubi Nasty Lv2 | Defeated by Rokurokubi at lewd level 2 |
| Rokurokubi Nasty Lv3 | Defeated by Rokurokubi at lewd level 3 |
| Rokurokubi breast milk constitution | Defeated by Rokurokubi due to breast milk constitution |
| Nozuchi lewd Lv1 | Defeated by Nozuchi at lewd level 1 |
| Nozuchi lewd Lv2 | Defeated by Nozuchi at lewd level 2 |
| Nozuchi lewd Lv3 | Defeated by Nozuchi at lewd level 3 |
| Nozuchi breast milk constitution | Defeated by Nozuchi due to breast milk constitution |
| Kikiko lewd Lv1 | Defeated by Kiko at lewd level 1 |
| Kikiko lewd Lv2 | Defeated by Kiko at Lewd Lv2 |
| Kiko lewd Lv3 | Defeated by Kiko at lewd level 3 |
| Tree child demon parasitism | Defeated by Kiko due to demon parasitism |
| Tako Nyudo Lewd Lv1 | Defeated by Tako Nyudo at lewd level 1 |
| Tako Nyudo Lewd Lv2 | Defeated by Tako Nyudo at lewd level 2 |
| Tako Nyudo Lewd Lv3 | Defeated by Tako Nyudo at lewd level 3 |
| Takonyudo breast milk constitution | Defeated by Tako Nyudo due to breast milk constitution |
| Kappa lewd Lv1 | Defeated by Kappa at Lewd Lv1 |
| Kappa lewd Lv2 | Defeated by Kappa at Lewd Lv2 |
| Kappa lewd Lv3 | Defeated by Kappa at Lewd Lv3 |
| Sazae demon lewd Lv1 | Defeated by Sazae Oni at lewd Lv1 |
| Sazae demon lewd Lv2 | Defeated by Sazae Oni at Lewd Lv2 |
| Sazae demon lewd Lv3 | Defeated by Sazae Demon at lewd level 3 |
| Sazae demon breast milk constitution | Defeated by Sazae Demon due to breast milk constitution |
| Amanojaku Lewd Lv1 | Defeated by an evil demon at lewd level 1 |
| Amanojaki lewd Lv2 | Defeated by an evil demon at lewd level 2 |
| Tenjaki lewd Lv3 | Defeated by an evil demon at lewd level 3 |
| demon parasitic demon | Defeated by demons due to demon parasitism |
| Starving Skull Lewd Lv1 | Defeated by Starving Skull at lewd level 1 |
| Starving Skull Lewd Lv2 | Defeated by Starving Skull at lewd level 2 |
| Starving Skull Lewd Lv3 | Defeated by Starving Skull at lewd level 3 |
| Hungry Skull Demon Parasitic | Defeated by Hungry Skull due to demon parasitism |
| Hot Spring 1 Lewd Lv1 | Go to a hot spring at an inn at lewd level 1 |
| Hot spring 1 lewd Lv2 | Go to a hot spring at an inn at lewd level 2 |
| Hot Spring 1 Lewd Lv3 | Go to a hot spring at an inn at lewd level 3 |
| Hot spring 1 Breast milk constitution | Going to a hot spring at an inn while breastfeeding |
| hot spring 2 | Automatically occurs after hot spring 1 when lewd Lv3 |
| Hot spring 2 Breast milk constitution | Automatically occurs after hot spring 1 when lewd Lv3/breastfeeding constitution |
| Hotel 1 Lewd Lv1 | Go to a downtown hotel at lewd level 1 |
| Hotel 1 Nasty Lv2 | Go to a downtown hotel at lewd level 2 |
| Hotel 1 Nasty Lv3 | Go to a downtown hotel at lewd level 3 |
| hotel 2 | Automatically occurs after Hotel 1 when lewd Lv3 |
| Hotel 2 Demon Infestation | Automatically occurs after Hotel 1 when lewd Lv3/demon infestation |
| Yoko’s Helper 1 Lewd Lv1 | Help out Yoko’s store at Lewd Lv1 |
| Yoko’s Helper 1 Lewd Lv2 | Help out Yoko’s shop at Lewd Lv2 |
| Yoko’s Helper 1 Lewd Lv3 | Help out Yoko’s shop at Lewd Lv3 |
| Yoko’s helper 1 Breast milk constitution | Helping Yoko at the store because of her breast milk constitution. |
| Yoko’s help 2 | Automatically occurs after Yoko’s help 1 when lewd Lv3 |
| Yoko’s Helper 2 Breast Milk Constitution | Automatically occurs after Yoko’s help 1 when lewd Lv3/breastfeeding constitution |
| Molester 1 Lewd Lv1 | When using the station at lewd level 1, select “I will endure until I get to the station” |
| Molester 1 Lewd Lv2 | When using the station at lewd level 2, select “I will endure until I get to the station” |
| Molester 1 Lewd Lv3 | When using the station at lewd level 3, select “endure until you reach the station” |
| Molester 2 | Automatically occurs after Molester 1 when lewd Lv3 |
| Molester 2 Demon Parasitism | Automatically occurs after molestation 1 when lewd Lv3/demon parasitism |
| Spiritual power provision 1 Lewd Lv1 | Provide spiritual power to Yoko at Lewd Lv1 |
| Spiritual power provision 1 Lewd Lv2 | Provide spiritual power to Yoko at lewd level 2 |
| Spiritual power provision 1 lewd Lv3 | Provide spiritual power to Yoko at lewd level 3 |
| Spiritual power provision 1 Breast milk constitution | Providing spiritual power to Yoko with breast milk constitution |
| Spiritual power provision 2 | Automatically occurs after providing spiritual power 1 when lewd level 3 |
| Spiritual power provision 2 Breast milk constitution | Automatically occurs after providing spiritual power 1 when lewd Lv3/breastfeeding constitution |
| Image club 1 lewd Lv1 | Works at an image club at lewd level 1 |
| Image club 1 lewd Lv2 | Works at an image club at lewd level 2 |
| Image club 1 lewd Lv3 | Works at an image club at lewd level 3 |
| Image club 2 | Automatically occurs after image club 1 when lewd Lv3 |
| Image club 2 breast milk constitution | Automatically occurs after image club 1 when lewd Lv3/breastfeeding constitution |
| Vibrator lewd Lv2 | Masturbating at home with a lewd level 2 vibrator |
| Vibrator Lewd Lv3 | Masturbating at home with a lewd level 3 vibrator |
| Vibrator demon parasitic | Indulging in masturbation at home while infested with demons and in possession of a vibrator |
| Brush lewd Lv2 | Indulge in masturbation at home with a lewd Lv2 brush rotor |
| Brush lewd Lv3 | Indulge in masturbation at home with a lewd Lv3 brush rotor |
| Brush breast milk constitution | Indulge in masturbation at home with a breast milk constitution and a brush rotor |
| vibrator and brush rotor | Masturbate using both vibrator and brush rotor |
| Vibrator and brush rotor Breast milk constitution | I masturbate using both a vibrator and a brush rotor due to my breast milk constitution. |
| Vibrator and brush rotor demon parasitic | Indulging in masturbation using both a vibrator and a brush rotor due to a demon parasitic |
| Vibrator and brush rotor breast milk constitution + demon parasitism | Indulge in masturbation using both a vibrator and a brush rotor with a breast milk constitution and demon parasitic state |
| tentacle underwear | Indulge in masturbation while possessing the obscene tag of Tsukumogami |
| Tentacle underwear breast milk constitution | She has a tendency to breastfeed and indulges in masturbation while possessing the Tsukumogami obscene tag. |
| Tentacle Underwear Demon Parasitic | He is parasitic with demons and possesses the obscene tag of Tsukumogami and indulges in masturbation. |
| Tentacle underwear breast milk constitution + demon parasitism | Indulge in masturbation while possessing a obscene tag of Tsukumogami due to breast milk constitution and demon parasitic state. |
Combat H
| H scene | Occurrence conditions |
| Juvenile | Receiving H attacks from demons such as Tako Nyudo |
| Breast sucking | Receiving H attacks from demons such as oil babies |
| Nipple grab | Receiving H attacks from demons such as red demons |
| kiss | Receiving an H attack from demons such as Ippondatara. |
| Cunnilingus | Receiving H attacks from demons such as red demons |
| suction tentacles | Receives an H attack from the final boss etc. |
| After breast massage | Receiving an H attack from demons such as Ippondatara. |
| Before breast massage | Receiving an H attack from a demon such as a half-demon human. |
| Butt massage | Receiving an H attack from demons such as Genranki |
| Ass licking | Receiving H attacks from demons such as Kainade |
| Tentacle inside bra | Receiving H attacks from demons such as Kainade |
| tentacle kiss | Receiving H attacks from demons such as umbrella ghosts |
| panty licking tentacle | Receiving H attacks from demons such as umbrella ghosts |
| tentacles in pants | Receiving H attacks from demons such as Kiko |
| breast sucking tentacles | Receiving H attacks from demons such as Kiko |
| Fingering | Receiving an H attack from a demon such as a half-demon human. |
| inborn | Receiving H attacks from demons such as Tsutsuga Mushi. |
| magic liquid injection | Receiving H attacks from demons such as Sazae Oni |
| nursing oil | Receiving H attacks from demons such as milk drinking oil. |
| hypnosis | Receiving an H attack from demons such as Genranki |
| Breast milk constitution | Receiving H attacks from demons such as oil babies |
| demon parasitism | Receiving H attacks from demons such as Tsutsuga Mushi. |
| Breast milk constitution + demon parasitism | Breast milk constitution and demon parasitic state |
| Climax | Pleasure value becomes 100 during battle |
Various data
Skill list/effects
| skill | How to learn | effect |
| Shamanship: Healing No. 1 | initial acquisition | Recover own HP |
| Secret Sword: Reizansen | Lv2 | Great damage to a single enemy & chance of inflicting laceration status |
| Shamanship: Breath of sleep | Lv3 | put all enemies to sleep |
| Shamanship: Hidden Robe | Lv4 | Warp to field map |
| Secret Sword: Yukisho | Lv5 | Massive damage to a single enemy and chance of freezing |
| Shamanship: Breath of Silence | Lv6 | silence all enemies |
| Secret sword: Tsukiga | Lv7 | Attacks a single enemy & has a chance of inflicting confusion |
| Shamanship: Barrier Formation | Lv8 | Reduces damage taken until the end of the battle |
| Shamanship: Split Wind Blade | Lv9 | Attacks all enemies & gives laceration status with probability |
| Shamanship: Healing No. 2 | Lv11 | Recovers own HP considerably |
| Shamanship: Healing Light Formation | Lv12 | Grants a state that automatically recovers HP for a while. |
| Secret sword: Hanamai | Lv14 | Attacks a single enemy & has a chance of inflicting a daze state |
| Shamanship: Healing no Kyoku Shiki | Lv17 | Recovers own HP by 999 & heals laceration status |
| Shamanship: Spiritual Sword | Hiyori event | Increases own attack power and critical hit rate until the end of the battle. |
| Shamanship: Crimson Flame | Hiyori event | Attacks all enemies & reduces defense |
Shop data
Item
| item | price | effect |
| Konpakumaru | 12 | Recover some strength |
| Purifying medicine | 8 | Treats breast milk constitution, demon parasitism, and increased sensitivity |
| moon fragment | 40 | Confuse all enemies |
| dazzling smoke ball | 28 | Illusion all enemies |
| Aphrodisiac of estrus | 150 | The lewdness level and pleasure level increase by 50 and become a state of increased sensitivity. |
| elixir of depression | 20 | Treat the heightened sensitivity state by setting the lewdness level and pleasure level to 0. |
| Healing talisman | 1000 | Heals lacerations and dazes and fully recovers physical strength and spiritual power. |
| spirit ball | 100 | Recovers a little spiritual power |
| jet black feather | 25 | Warp to field map |
Ornaments
| item | price | effect |
| magatama of power | 100 | Attack power +5 |
| magatama of the wind | 100 | Speed +5 |
| ring of counterattack | 300 | You will rarely counterattack against your opponent’s attacks. |
| ring of peace | 300 | Your health will gradually recover during battle. |
Konpaku Fortune Telling
First prize
| item | effect |
| Extreme Magatama of Life | Max HP+60 |
| Magatama of extreme strength | Attack power +30 |
| Magatama of ultimate shaman power | Max MP +30, shaman power +40 |
| Extreme Guardian Magatama | Defense power +40, magic resistance +40, attribute damage reduction |
| Polar Gale Magatama | Speed +30 |
| Sword Saint’s Ring | Continuous attacks are now possible instead of not being able to use shamanism. |
| Ring of Spiritual Attenuation | MP consumption becomes 1/4 |
| ring of healing | Health will now automatically recover during battle |
| Tsukumogami’s indecent card | Items used during masturbation |
| secret scroll | Items that increase the level by 1 |
| pill set | Items that increase status |
Second prize
| item | effect |
| True Life Magatama | Max HP+30 |
| Magatama of true strength | Attack power +20 |
| Magatama of true shaman power | Max MP +15, shaman power +25 |
| True Guardian Magatama | Defense power +30, magic resistance +30, attribute damage reduction |
| True Gale Magatama | Agility +20 |
| ring of farewell | Increases hit rate and evasion rate, nullifies surprise attacks and gruesome blows, and counterattacks with 1/4 chance |
| ring of love | Attack power +5 & critical hit becomes easier |
| magician’s ring | Shrine power +16 & shamanship damage increased |
| Strengthening Spirit Talisman | Items that strengthen equipment |
| vibrator | Items used during masturbation |
| brush rotor | Items used during masturbation |
Third prize
| item | effect |
| Konpakugan x 10 & purification potion x 5 & spiritual ball x 5 | Consumption items |
| Healing talisman | Consumption items |
| Estrus aphrodisiac x2 | Consumption items |
| Demon body fluid & demon egg | Items that cause breast milk constitution and demon parasitism |
| Moon Fragment x3 & Dazzling Smoke Ball x3 | Consumption items |
| magatama of life | Max HP+15 |
| Magatama of strength | Attack power +10 |
| Magatama of shaman power | Max MP +10, shaman power +15 |
| Magatama of protection | Defense power +15, magic resistance +15, attribute damage reduced slightly |
| Gale Magatama | Speed +10 |
| Ring of interception | Halve all attribute damage |


